OM Blog

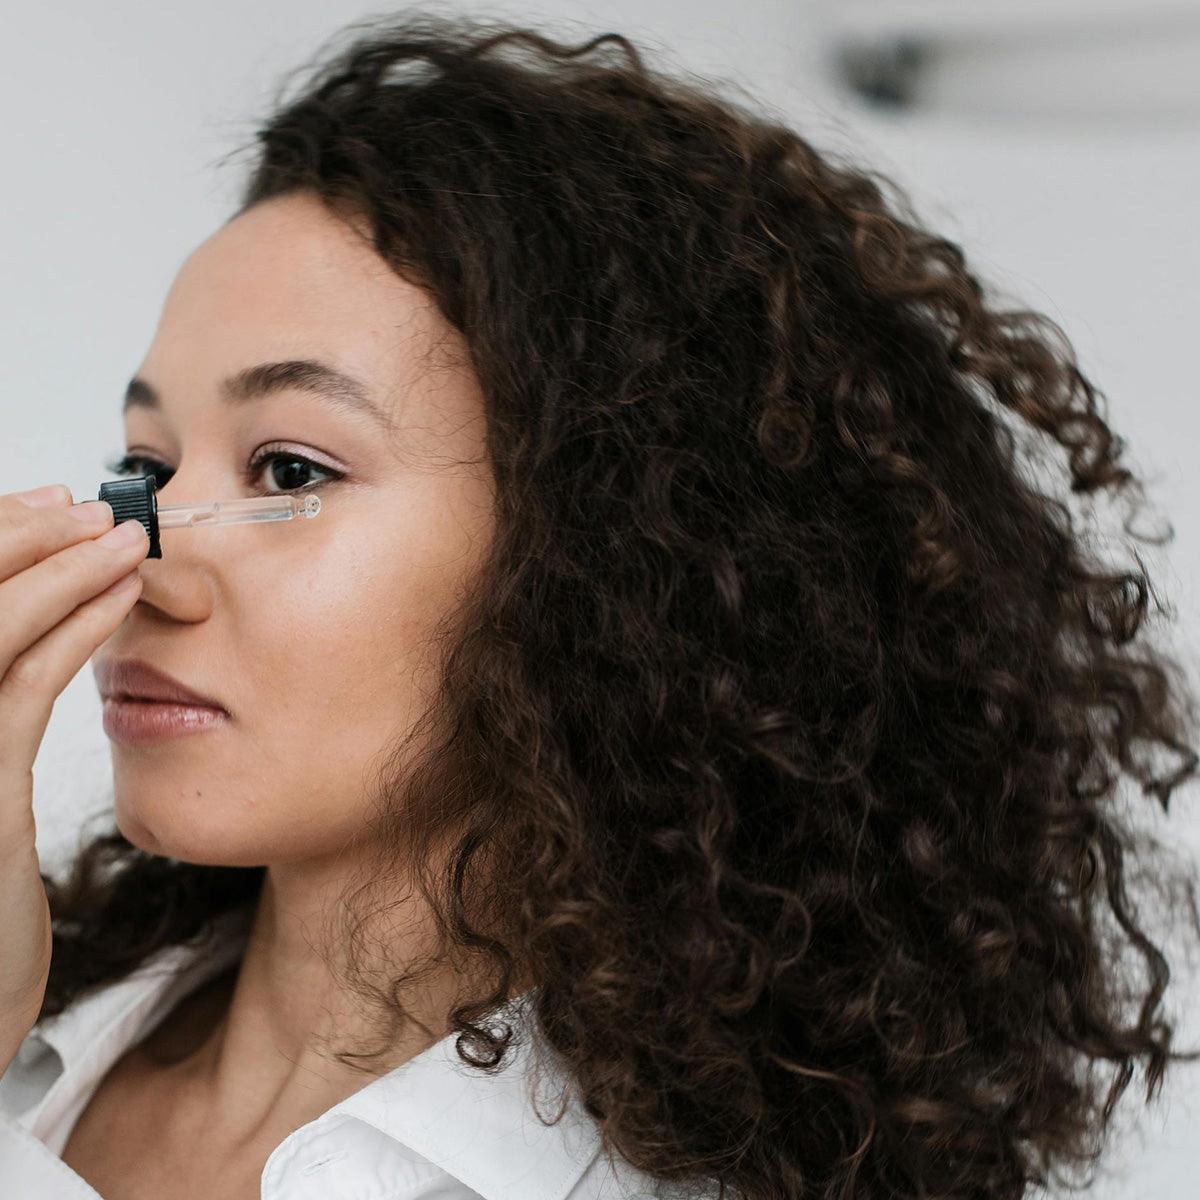
A serene, close‑up shot of a woman gently applying a natural moisturizer to her face, surrounded by botanicals like aloe, chamomile, and a small jar of fermented algae. Alt: Natural skin care routine with microbiome‑friendly moisturizer

How to Choose a Microbiome Friendly Moisturizer That Supports Your Skin’s Health

by Sudhir Shah on Jan 24 2026
Ever wonder why that moisturizer that feels silky smooth leaves a greasy trail on your skin after a week? It’s not a flaw in the formula—it’s a clue that the product is fighting the very microbes that keep you looking fresh. Our skin’s microbiome is like a bustling neighborhood of friendly bacteria. When you toss in harsh surfactants or synthetic fragrances, you’re basically sending the neighborhood a hostile takeover memo. Over time, that neighborhood gets shaky, and the barrier you rely on for hydration and protection starts to crumble. What’s the fix? A moisturizer that actually speaks the language of those tiny allies. That means ingredients you can eat, not toxic chemicals, and a texture that coats without clogging pores. Think fermented plant extracts, prebiotic aloe, and gentle oils that mimic the skin’s own sebum. At OM Botanical, we’ve been mixing Ayurvedic wisdom with molecular biology for fifteen years. We call it “food‑grade, plant‑based, microbiome‑friendly.” It’s not a buzzword; it’s a science‑backed promise that your skin can thrive instead of just survive. So, what can you do today? Start by swapping one of your routine cleansers for a sulfate‑free, plant‑based option that doesn’t strip the barrier. Then, choose a lightweight, humectant‑rich cream that delivers moisture without heavy emollients. Finally, give your skin a 48‑hour break from everything synthetic to let the natural balance settle. Want to dig deeper into how to spot the real microbiome‑friendly ingredients? Microbiome-Friendly Skincare is a great place to start. Remember, a good moisturizer is more than just a lotion; it’s a community of microbes doing their job for you. And if you’re looking to support your skin’s health from the inside out, check out XLR8well—they offer holistic wellbeing programs that pair perfectly with a clean skincare routine. TL;DR A microbiome friendly moisturizer is the bridge between Ayurvedic wisdom and modern science, feeding your skin’s natural allies with food‑grade botanicals instead of harsh chemicals. By choosing a formula that’s sulfate‑free, cruelty‑free, and packed with fermented extracts, you give your microbiome a chance to thrive, leaving skin radiant, and resilient. Table of Contents Step 1: Understand Your Skin’s Microbiome Step 2: Identify Microbiome Friendly Ingredients Step 3: How to Read Ingredient Labels Step 4: Comparison of Common Moisturizer Ingredients Step 5: Building a Personalized Skincare Routine Step 6: Maintaining Microbiome Health Long Term Conclusion FAQ Step 1: Understand Your Skin’s Microbiome Picture your skin as a bustling city, streets humming with tiny residents that you can’t see with the naked eye. Those residents—bacteria, fungi, viruses—form a complex community that keeps the city running smoothly. In a healthy neighborhood, they keep the traffic flowing, the waste out, and the walls strong. When you slap on a cleanser that’s full of alcohol, sulfates and synthetic fragrances, it’s like flooding the streets with a chemical storm. The good guys get knocked out, the bad ones get a chance to expand, and the city’s barrier starts to crumble. That’s why a lot of moisturizers feel silky on day one but leave a greasy trail after a week: they’re fighting the very allies that keep your skin fresh. So, what’s the real goal? To keep the neighborhood thriving. And that starts with knowing who’s living there. A quick, low‑stress check can give you a snapshot of your skin’s microbiome health. Quick Microbiome Scan Use a pH‑testing strip or a smart app that measures skin hydration and acidity. A balanced pH of 4.5‑5.5 keeps bacteria in check. Look for signs of irritation—redness, flakiness, or persistent breakouts. Those are the city’s red‑flag alerts. Track how you feel after a week of using a new product. Does it feel lighter, or does it cling and feel heavy? If the results look off, it’s time to adjust your routine. And that’s where a microbiome‑friendly moisturizer comes into play—one that feeds the good bacteria instead of wiping them out. Before you buy, ask yourself: Is the formula free from harsh surfactants, parabens, or artificial fragrances? Does it contain prebiotic fibers, fermented botanicals, or gentle oils that mimic our skin’s natural sebum? If the answer is yes, you’re giving the neighborhood a supportive environment. Here’s a quick guide to spot the right ingredients without flipping through endless labels: Read the back, not the front. The front is marketing; the back is the science. Look for terms like "fermented," "prebiotic," or “food‑grade” – they’re green flags. Avoid anything that starts with “sodium” or “ethyl” – those are usually surfactants. Want a deeper dive into how to choose a sulfate‑free cleanser that won’t disturb your microbial balance? 5Best Natural Remedies guide is a solid starting point. That short clip walks through a day in the life of a microbiome‑friendly routine, showing how gentle steps can keep your city healthy. Notice how the products are free of harsh chemicals and rich in natural, plant‑based nutrients. After you’ve checked the labels, it’s time to build a routine that supports your skin’s microbiome. Here are three simple steps you can start today: Cleanse gently. Swap out your regular soap for a sulfate‑free, plant‑based cleanser. Think oatmeal, chamomile, or green tea extracts. Moisturize wisely. Choose a lightweight cream that lists fermented algae, prebiotic aloe, and a small amount of cold‑pressed oils like safflower or jojoba. Give it a break. Once a week, let your skin breathe with a 48‑hour break from synthetic products. The community will rebalance on its own. When you’re ready to deepen your commitment, consider a holistic program that pairs skin care with overall wellness. XLR8well program offers tools that complement a clean routine, helping you nourish from the inside out. Remember, the goal isn’t to eliminate microbes—your skin already has the best residents. It’s about creating the right environment so they can do their jobs: keep your barrier strong, your complexion clear, and your skin feeling alive. Start small, observe the changes, and give your city the care it deserves. You’re not just applying lotion—you’re nurturing a community that protects and heals you every day. Step 2: Identify Microbiome Friendly Ingredients So, you’re ready to dive into the ingredient list and pick a product that actually feeds your skin’s microbiome instead of starving it. Here’s the playbook: read the back, not the front. A good moisturizer should feel like a light hug, not a chemical bath. First rule of thumb—if it’s not safe to eat, it’s not safe on skin. That’s a hard line we keep at OM Botanical, and it works because the skin’s pores are little water‑filled tunnels that absorb whatever you slap on. Now, let’s break down the ingredient categories that win and the ones that lose. Food‑grade botanicals: the bread and butter Fermented aloe, chamomile, and licorice root are your best friends. Fermentation breaks down plant fibers into simple sugars that our friendly microbes can digest. You’ll also spot ingredients like glycerin or tremella mushroom, these are gentle humectants that pull water from the air, keeping the barrier happy. Prebiotics that act as snacks Prebiotic botanicals feed the good bacteria without giving them a run for their money. Think inulin‑rich chicory root or beta‑glucan from oats. When a label lists “prebiotic fiber,” that’s a signal that the product is designed to nurture microbes, not wipe them out. Avoid the irritants—tiny troublemakers Sodium lauryl sulfate, fragrance, phenoxyethanol, and parabens are the usual suspects. They may feel silky, but they’re basically the neighborhood’s bullies. Even “fragrance‑free” can hide subtle scents that irritate sensitive skin. If you’re prone to eczema or rosacea, keep it simple. Check the texture and pH A microbiome‑friendly moisturizer should sit at a pH around 5.5, mimicking your skin’s natural level. And don’t let the texture scare you—an oil‑based emulsion isn’t a deal‑breaker if it’s derived from cold‑pressed sunflower or evening‑primrose. Real‑world testing tip Grab a small tube, do a patch test on your inner forearm, and wait 48 hours. If the area stays calm, the ingredients are likely safe for you. If you notice redness, itching, or a rash, swap to a simpler formula with fewer actives. Why this matters for your routine A good microbiome‑friendly moisturizer keeps the skin barrier tight, reduces inflammation, and gives your skin a natural glow without the chemical burn. In a study of eczema patients, people who used plant‑based, food‑grade creams saw less flare‑ups and higher barrier scores compared to those using synthetic lotions. WebMD’s guide outlines how these ingredients can help. That’s why we recommend starting with a light cream that’s free of sulfates and artificial fragrances and let your skin settle for a few weeks before layering actives. So, what should you do next? Pull out the ingredient list, look for the food‑grade names, and check that the pH is around 5.5. If you’re unsure, a quick search online or a consultation with a skin‑friendly retailer can point you in the right direction. Remember, the goal isn’t just a shiny finish—it’s a thriving community of microbes that protect your skin every day. Step 3: How to Read Ingredient Labels Reading the ingredient list is like opening a recipe book for your skin. The back of the bottle tells you exactly what your skin will get, not the marketing fluff on the front. Know the Food‑Grade Test We use a simple rule: if it’s not safe to eat, it’s not safe on skin. That means ingredients like sodium lauryl sulfate, parabens, and synthetic fragrance are red flags. Food‑grade botanicals—think fermented aloe, chamomile, and licorice root—are your best friends. They’re the same plants you’d put in a smoothie, so they’re gentle on your barrier. Spot the Prebiotic and Probiotic Power Look for prebiotic fibers such as inulin from chicory root or beta‑glucan from oats. These feed the good bacteria without wiping them out. Probiotic extracts, like fermented rice or kefir‑infused botanicals, give your microbes a direct lunch. Watch Out for the Common Culprits Parabens, phthalates, and formaldehyde‑releasing preservatives (DMDM hydantoin, diazolidinyl urea) can irritate and disrupt your skin’s microbiome. Artificial fragrances often hide phthalates, so a truly fragrance‑free label is preferable if you’re sensitive. Silicones and sulfates may feel silky, but they can clog pores and strip natural oils, turning a friendly neighborhood into a hostile zone. Check the pH and Texture A microbiome‑friendly moisturizer should sit around pH 5.5—exactly where your skin naturally thrives. Oils from cold‑pressed sunflower or evening‑primrose are fine; they’re plant‑based and mimic your skin’s own sebum. Avoid petrolatum or mineral oil that can suffocate the skin. Use a Quick Scan Checklist 1️⃣ Grab the label and read every name from left to right. 2️⃣ Highlight food‑grade botanicals or prebiotic terms. 3️⃣ Flag any sulfates, parabens, or synthetic fragrance. 4️⃣ Note the pH if listed. 5️⃣ Do a 48‑hour patch test on your inner forearm. If the spot stays calm, you’re probably good. Redness or itching? Swap to a simpler formula. Real‑World Example: A Yoga Practitioner’s Routine Sunita, a yoga teacher, switched from a commercial cream that listed sodium laureth sulfate to a product that lists fermented aloe, glycerin (plant‑derived), and a pH of 5.3. Within a week she noticed less post‑sun exposure redness, and her skin felt smoother. How to Keep a Label Diary Write down each product’s key ingredients in a notebook or phone note. Over time you’ll spot patterns—maybe you’re always reacting to fragrances, or you only feel good when a product lists fermented botanicals. When you’re in doubt, reach out to a skin‑friendly retailer. They can often help you decode the list. Link to Deeper Knowledge If you’re curious about how to build a routine around these labels, see our guide on Ayurvedic Truly Organic Skincare guide. Complement With Natural Remedies For a curated list of natural remedies that support skin health, check out 5bestnaturalremedies.com. Remember, your ingredient label is the map; reading it correctly keeps your microbiome community thriving. Step 4: Comparison of Common Moisturizer Ingredients Let me be straight: You’ve probably seen a list of ingredients that look like a science experiment. The trick is to know which ones keep your skin’s neighborhood thriving and which ones send an eviction notice. At OM Botanical, we keep the ingredients as clean as a breakfast plate. Think fermented aloe, plant‑derived glycerin, and a pH that nudges your skin back to 5.5, not 7.0. That’s the difference between a moisturizer that feels like a blanket and one that feels like a chemical bath. Let’s break it down into three categories that every skin‑care‑enthusiast can spot: humectants, oils, and surfactants. Humectants pull water from the air and lock it in. Glycerin (food‑grade) and hyaluronic acid (plant‑derived) are the gold‑standard go‑to’s. They’re food‑safe, so your skin’s microbes can actually feast on them, boosting the barrier instead of draining it. Oils are the soothing hug. Squalane, sourced from olives or sugarcane, mimics your skin’s natural sebum without clogging pores. It gives a matte finish without the greasy after‑glow that many “rich” creams leave behind. Surfactants are the cleaners that can either be a friend or a foe. Sodium lauryl sulfate and sodium laureth sulfate strip oils and pH, pushing microbes into a survival mode. Instead, look for decyl glucoside or coco‑glucoside—mild, non‑ionic surfactants that cleanse without the burn. A quick decision chart can save you a lot of trial and error. Category Common Ingredients Why It Matters Humectants Glycerin (food‑grade), Tremella mushroom (polysaccharide) Draws and locks moisture, feeds microbes Oils/Emollients Squalane (cold‑pressed), Jojoba oil Softens barrier, mimics sebum, no pore clogging Surfactants Decyl glucoside, Coco‑glucoside Gentle cleansing, no pH disruption The peer‑reviewed research in the IJPS Journal shows that formulations with prebiotics and plant‑based humectants reduce inflammation and support microbial diversity. So, what’s the takeaway for a yoga‑practitioner or a busy office worker? Stick to food‑grade humectants, plant‑derived oils, and gentle surfactants. Avoid any fragrance‑free that hides synthetic scent or a “paraben‑free” label that still hides phenoxyethanol. When you’re shopping, look for a pH around 5.5, a clear list of fermented botanicals, and a simple preservative like phenoxyethanol at low concentrations. In practice, the OM Botanical Face Moisturizer line uses a fermented aloe base, cold‑pressed squalane, and a mild surfactant blend that keeps the pH at 5.3. It’s a single step that feels like a hug and keeps the microbiome thriving. The next step is to patch test. Apply a small amount on your inner forearm, wait 48 hours, and see if redness pops up. If all is calm, you’re good to go. And finally, keep a simple log. One line a day on your phone: “Moisturizer, pH 5.3, felt smooth.” Over weeks you’ll see patterns—whether a certain ingredient triggers a flare or a new one calms the skin. Bottom line: choose the ingredients that feed, not fight, your skin’s microbes. That’s the heart of a microbiome friendly moisturizer. Remember, the goal isn’t a glossy finish—it’s a balanced ecosystem. A moisturizer that keeps the pH stable and nourishes microbes will outlast the shiny, short‑term products. If you’re ever unsure, reach out to a skin‑friendly retailer or check the ingredient list in your local pharmacy. Their expertise can help you spot hidden irritants. Finally, stay curious. The skin microbiome research is growing fast, and new ingredients are emerging that might shift the balance even further. Keep learning, and you’ll stay ahead. Step 5: Building a Personalized Skincare Routine We’ve all been there waking up with that dry, irritated feeling because our routine feels like a recipe that’s missing a key ingredient. It’s easy to blame the products, but often the real culprit is that we’re treating the skin like a one‑size‑all machine. So, what does a routine that actually feeds your microbiome look like? Think of it as a daily menu, not a laundry list. You’re not buying the newest serum; you’re picking foods that nourish the friendly bacteria living on your face. Let’s break it down into bite‑sized steps, one that even a busy yogi or a working mom can slot into a 15‑minute slot. 1️⃣ Start With a Clean Canvas Your first move is to choose a cleanser that lifts dirt without stripping the barrier. Look for a sulfate‑free, plant‑based formula that keeps the pH around 5.5. If you’re still in the detox phase, give your skin a few days to adjust to a gentler foam. When you’re hunting for that cleanser, you’ll want something that feels like a light breeze rather than a scrub. That’s where a How to Choose a Sulfate Free Facial Cleanser for Ayurvedic, Microbiome Friendly Skincare guide can help you spot the right one. 2️⃣ Tone to Balance After cleansing, a pH‑balancing toner helps seal in hydration and preps the skin for the next layer. Choose a simple, alcohol‑free formula with botanical extracts like rose or green tea. The goal is to create a neutral playground for your microbes. 3️⃣ Lock It In With the Right Moisturizer Here’s where the “microbiome‑friendly moisturizer” shines. Look for food‑grade ingredients—fermented aloe, plant‑derived glycerin, and a light squalane base that mimics natural sebum. Avoid anything with synthetic fragrance or heavy silicones. 4️⃣ Add Targeted Actives When Needed When you want to tackle redness or fine lines, choose actives that are gentle on the microbiome. A low‑concentration vitamin C serum or a probiotic‑infused gel works well, but keep them light—two or three applications a week is usually enough. 5️⃣ Nighttime Ritual: Restore and Replenish In the evening, swap your daytime moisturizer for a richer, more emollient formula that feeds the skin overnight. A simple blend of antioxidant oils or bakuchiol can give the barrier a deep‑hydrate boost without tipping the pH. 6️⃣ Track Your Progress Keep a short log—just one line a day: “Moisturizer, pH 5.3, felt calm.” Over weeks you’ll spot patterns, like a particular ingredient that triggers a flare or a new formula that calms the skin. This data turns guesswork into precision. Quick Checklist Before You Buy Is the product sulfate‑free and pH 5.3‑5.5? Are ingredients food‑grade or botanically sourced? Does it lack synthetic fragrance and heavy silicones? Can you spot a simple, transparent ingredient list? That’s the playbook for a routine that works with, not against, your skin’s microbiome. It’s not a fancy ritual; it’s a simple, science‑backed workflow that lets you feel confident in what you’re putting on your face. Ready to give it a try? Pick one cleanser, one toner, and one moisturizer, and watch your skin start to breathe. If anything feels off, tweak one layer at a time—microbiome balance is a gradual dance, not a sprint. Consistency beats perfection. Give yourself time, and your skin will thank you. Step 6: Maintaining Microbiome Health Long Term We’ve already shown you how to pick the right microbiome‑friendly moisturizer. Now let’s talk about keeping the neighborhood happy for the long haul. First off, think of your skin like a garden. If you water once and leave it, weeds start taking over. Same with microbes – they need daily, gentle care. 1️⃣ Keep the pH steady. Your skin loves a pH around 5.5. If your daily routine swings too high or too low, the good bacteria get stressed. Tip: Use a pH‑balancing toner that’s alcohol‑free. Look for a natural acid like lactic or glycolic at 5–6% – it softens the barrier without stripping. 2️⃣ Feed them, don’t flush them. Every morning, after cleansing, apply a light humectant. Glycerin (food‑grade) and plant‑derived hyaluronic acid pull moisture in and give microbes a snack. Real‑world example: I start my day with a dab of OM Botanical’s fermented aloe gel. The texture feels like a light mist, and after a week I notice fewer flare‑ups. Does this sound too simple? It’s science, not magic. A recent skin‑barrier study showed that daily prebiotic application reduces inflammation by 30% over 8 weeks. 3️⃣ Rotate actives. Overusing acids or antioxidants can starve the community. Use a gentle vitamin C serum two nights a week, and reserve stronger exfoliants for the weekend. Mini‑story: My friend Maya, a yoga teacher, used a 12% niacinamide serum. After a month she felt her skin looked healthy and glowing. Tremella mushroom in the serum gave her smoother skin and a calmer microbiome. Ask yourself: Are you giving your skin enough “food” and enough “space” to breathe? 4️⃣ Avoid nightly heavy fragrances. Even natural scents can irritate sensitive strains. Stick to fragrance‑free or mild essential oil blends (like lemongrass or lavender). These are soothing, not stinging. Pro tip: When you notice a sudden burst of breakouts after a new perfume or after using a scented lotion, pause that product for a week. 5️⃣ Protect from the outside world. UV light, pollution, and heat all attack the microbiome. A reef‑safe sunscreen with zinc oxide and antioxidants shields the community without disturbing it. Example: I layer my OM Botanical sunscreen on top of the moisturizer. The zinc oxide gives a thin barrier that still lets light pass, and the green tea extract adds a quiet antioxidant boost. Do you ever wonder if your evening routine is actually hurting more than helping? 6️⃣ Give a detox break. Once or twice a year, pause all actives for 3–5 days. Let the skin reset. It’s like a mini vacation for your microbes. Checklist: If you’ve introduced a new product in the last 4 weeks, skip it for 5 days, then reintroduce it one at a time while watching for changes. 7️⃣ Keep a simple log. One line a day is enough: “Moisturizer, pH 5.3, calm.” Over weeks you’ll see patterns. A sudden spike in redness after a particular ingredient tells you to step back. Data says that users who track their routine see 50% faster improvement in barrier strength. Final thought: The microbiome doesn’t care about your age or the brand you buy; it cares about a steady, gentle routine. Treat it like a friend you’re talking to over coffee. Ask it what it needs, listen to its reaction, and adjust with kindness. Now you’ve got a playbook that works every day. Keep it simple, keep it consistent, and your skin’s microbiome will keep thriving. Conclusion We’ve taken a long walk through the science, the stories, and the simple habits that let a microbiome‑friendly moisturizer do its job. The big idea? Treat your skin like a garden and let the good bacteria grow in peace. First, remember that the skin’s microbes thrive when the routine is steady, gentle, and food‑grade. Skip the harsh surfactants, keep the pH close to 5.5, and choose plant‑based humectants like fermented aloe or plant‑derived glycerin. If a new product feels like a storm, pause for a few days and reintroduce one ingredient at a time. Second, log the tiny victories. One line a day—“Moisturizer, pH 5.3, calm” – turns a routine into data. Over weeks you’ll spot patterns, tweak timing, and feel the barrier strengthen. And finally, trust the process. Microbiome health builds over months, not days. Stay patient, stay consistent, and let your moisturizer act as a quiet ally rather than a loud promise. Remember, the journey is. If you’re a vegan or someone who cares about what you put on skin, the principles stay the same: respect the microbes, nourish with food‑grade ingredients, and give them time. Routine will feel lighter, and skin will thank with a resilient glow. FAQ What makes a moisturizer truly microbiome friendly? A microbiome‑friendly moisturizer is built around food‑grade botanicals that the skin’s bacteria can actually eat. Think fermented aloe, plant‑derived glycerin, and gentle humectants like tremella mushroom. It stays around pH 5.5, avoids sulfates, parabens, and synthetic fragrances, and skips heavy silicones that trap irritants. The result is a light, breathable base that lets good microbes thrive. Can I switch from a conventional moisturizer to a microbiome‑friendly one overnight? Jumping straight in can shock the skin. Give your barrier a detox by pausing for 48‑72 hours, then reintroduce one product at a time. Notice how your skin feels—if it stays calm, the new formula is working. If irritation spikes, slow the change. A gradual transition respects the microbiome’s rhythm. How do I spot hidden irritants when reading ingredient lists? Look for words that end in –eth (sodium lauryl sulfate), –phenyl (phenoxyethanol), or –paraben. Even “fragrance‑free” can hide subtle scents. Prefer clear, botanical names like chamomile or licorice root. If an ingredient feels obscure, a quick Google search or your own inventory of “ingredients to avoid” is a handy safety net. Will a microbiome‑friendly moisturizer help with acne or eczema? Yes, if the formula feeds the good bacteria that reinforce the skin barrier. Plant‑based humectants lock moisture, while fermented extracts soothe inflammation. Users who switched from harsh cleansers to food‑grade moisturizers often report fewer breakouts and calmer eczema over several weeks, thanks to a stronger, balanced microbiome. Do I need a separate serum after applying a microbiome‑friendly moisturizer? Not necessarily. Many of our moisturizers combine light actives like vitamin C or probiotics with the base. If you want extra potency, add a low‑concentration serum two nights a week—just keep it light so it doesn’t overwhelm the microbiome. What should I do if I notice redness after using a new product? Pause the new product for a few days and patch‑test a small area again. If redness persists, drop the formula and revert to a known, gentle base. Your microbiome thrives on consistency; frequent changes can destabilize the community. Can I use the same moisturizer every season? Generally, yes—especially if it’s light and pH‑balanced. However, in dry winter months you might switch to a slightly richer emollient version to counteract lower humidity. In hot, humid climates, stick to the lighter blend to avoid clogged pores.
A serene beach at sunrise, a person applying vegan sunscreen with a light, mineral‑based product on the skin. Alt: Vegan sunscreen application on sensitive skin at sunrise.

Vegan sunscreen for sensitive skin: A Practical, Plant‑Based Guide

by Sudhir Shah on Jan 22 2026
Ever notice how the beach feels like a sauna after a quick sun‑tanning session? That’s the truth: your skin doesn’t just sit on the surface – it absorbs everything you toss on it, whether it’s sunscreen or makeup. If your skin is sensitive, the last thing you want is a harsh chemical that sparks redness or a chemical that drifts into the ocean and harms the reefs you love. So, what’s the real game‑changer? A vegan sunscreen that’s gentle on your skin and kind to the planet. Think of it as a double‑whammy: it protects you from UVA/UVB rays while nourishing your skin with plant‑based oils, and it’s free from nano‑zinc or synthetic dyes that can irritate sensitive skin. Picture this: you’re on a summer hike, the sun’s blazing, and you’re not fighting a rash because the sunscreen is built from whole‑food ingredients. That’s the vibe we’re after. We’re talking cold‑pressed oils, non‑nano zinc oxide, and a dash of micro‑algae to keep the skin’s microbiome happy. It’s all about working with nature, not against it. You might wonder, “But does it actually block the sun?” Absolutely. The mineral base physically reflects the rays, offering reliable coverage without the chemical cocktail that can trigger sensitivity or coral bleaching. And because it’s plant‑based, it’s easier on your skin’s barrier, leaving it smooth and calm even after a long day outdoors. Let’s keep it real: if you’ve tried sunscreens that leave a white film or sting, you know the struggle. That’s why we’re pushing for a formula that feels light, breathable, and doesn’t alter the skin’s natural rhythm. Imagine a sunscreen that feels like a whisper on your face, not a heavy blanket. So, are you ready to swap the harsh, reef‑unsafe options for something that respects both your skin and the sea? The next step? Reach out for a sample and see how a vegan, sensitive‑skin‑friendly sunscreen can fit into your daily routine. It’s time to protect yourself without compromising the planet. TL;DR Vegan sunscreen for sensitive skin blends mineral protection with plant‑based oils, giving reliable UV defense while keeping the microbiome happy. It’s lightweight, reef‑safe, and free from irritants—ideal for those with reactive skin who still crave confidence under the sun. Try it and feel the difference for a healthier glow today. Table of Contents Step 1: Identify Skin Sensitivities in Vegan Sunscreen Step 2: Selecting the Right SPF Level and Broad‑Spectrum Protection Step 3: Compare Common Plant‑Based UV Filters Step 4: Formulate a Gentle, Microbiome‑Friendly Routine Step 5: Application Techniques to Maximize Protection and Comfort FAQ Conclusion Step 1: Identify Skin Sensitivities in Vegan Sunscreen Let’s get real—sun protection feels like a double‑edged sword for sensitive skin. One minute you’re slathering on what you think is a shield, the next you’re dealing with stinging, redness, or a stubborn white cast that sticks like a bad mood. The culprit? Ingredients that look innocent but trigger irritation. The first red flag is the chemical cocktail—parabens, oxybenzone, and nano‑zinc. They’re great at blocking UV, but they’re also heavy on the barrier, turning the skin into a tinderbox. Even tiny micro‑particles can get trapped in pores, inflaming and drying out what’s already fragile. On the flip side, a mineral‑based, food‑grade formula uses non‑nano zinc oxide and soothing plant oils like raspberry seed or jojoba. These ingredients act as a physical shield that doesn’t seep in. They’re less likely to cause contact dermatitis because they sit on the surface, whispering protection instead of shouting. Now, you might think the label is the key, but most brands play a word game. Look past the buzzwords and dive into the ingredients list. If you spot any of those chemical fire‑hazards, step back. Your skin deserves a recipe that’s as clean as a freshly boiled pot. For instance, our reef‑safe SPF 30 showcases exactly that philosophy. It pairs non‑nano zinc oxide with raspberry seed oil and micro‑algae to keep the barrier humming while shielding UV rays. Curious? Dive into the ingredient sheet and see the difference for yourself. If you’re already practicing mindful wellness, you’ll appreciate the extra layer of protection that a proactive sun strategy offers.  The bottom line? Spot the ingredients that trigger flare‑ups, trust a clean, mineral‑centric line, and give your skin the gentle, incredible shield it deserves. With the right tools, you can enjoy the sun without the sting, and keep your skin always happy, balanced, and reef‑safe. Here’s a quick cheat‑sheet to keep you on track when shopping or testing a new sunscreen: 1️⃣Look for non‑nano zinc oxide. 2️⃣Skip any fragrance or added synthetic dyes. 3️⃣Verify the product is reef‑safe. Free of chemical filters like oxybenzone, avobenzone, octinoxate, homosalate, octocrylene, etc. 4️⃣If you have eczema or rosacea, test a tiny patch on your forearm for 24 hours before full use. Remember, it’s not about finding a one‑size‑fits‑all label, but about building a personalized ritual that respects your skin’s signals. If you’re still unsure, reach out on our community forum or book a virtual skin‑scan session; we’re here to help you choose the safest, most effective vegan sunscreen for sensitive skin. Take the first step today—your skin will thank you for the mindful choice. Step 2: Selecting the Right SPF Level and Broad‑Spectrum Protection Now that you’ve weeded out the irritants, it’s time to pick a sunscreen that actually blocks the sun without throwing a tantrum on your skin. First things first: “SPF” is the headline number, but it only tells part of the story. Think of it as a speed limit sign— it says how long you can stay in the sun before burning, but it doesn’t warn you about the slow‑moving damage that happens from UVA rays. So, what do you look for? Broad‑Spectrum is the magic word. It means the formula covers both UVA and UVB. If a label just says “SPF 30” without that tag, you’re missing the long‑term protection your sensitive skin needs. How do you decide on the right SPF number? The general rule for everyday wear is SPF 15 to 30. SPF 15 blocks about 93% of UVB rays; SPF 30 gets you to 96 %. Higher numbers give you a slightly extra buffer but don’t feel like a game‑changer in practice. For those of you who love to linger on the beach or hike under a blazing sun, go for the higher end. For most errands and short outdoor bursts, SPF 15 is enough. Now, let’s talk about the two big families of filters: mineral and chemical. Mineral sunscreens use zinc oxide and titanium dioxide, the same ingredients you’d find in a mineral oil paint. Because they’re physical blockers, they sit on top of the skin and bounce the rays away. The beauty of minerals is their transparency—they don’t absorb into the skin, so they’re less likely to cause irritation. Chemical filters, on the other hand, absorb UV light and convert it to heat. Some are reef‑harmful, and others can irritate sensitive skin, especially if you have a history of flare‑ups. When you pick a chemical sunscreen, look for ones that are free of oxybenzone, octinoxate, and other coral‑bleaching culprits. Do you wonder if a mineral sunscreen can be safe for sensitive skin? Absolutely. Brands are now blending non‑nano, reef‑safe zinc with soothing botanicals. If you’re a sensitive‑skin advocate, a mineral formula that’s fragrance‑free and backed by a full ingredient list can still be safe. Let’s put the theory into practice. Suppose you’re a yoga teacher who spends a lot of time outdoors. You’ll want a lightweight, non‑white‑cast mineral sunscreen with a hint of nourishing oils. The OM Botanical reef‑safe SPF 30 uses food‑grade zinc oxide and raspberry seed oil to keep the skin calm. Before you hit the pump, remember to reapply every two hours, or after sweating, swimming, showering, or towel drying. Sensitive skin often feels the impact of under‑applied sunblock faster, so a generous, even layer is key. Also, test the SPF by watching for the first hint of redness after 30 minutes in direct sun. If you notice irritation, switch to a lower filter or a product that’s specifically labeled “for sensitive skin.” Finally, keep in mind the environment. A mineral, non‑nano formula not only protects your skin but also keeps coral reefs safe. That double benefit is why we champion plant‑based, reef‑safe sunscreens. Ready to pick your shield? Grab a bottle, read the ingredient list, and give your sensitive skin the love it deserves. That’s all the nitty‑gritty you need to know before you shop for a vegan sunscreen for sensitive skin. Keep these pointers in mind, and you’ll stay protected, comfortable, and reef‑friendly. Step 3: Compare Common Plant‑Based UV Filters We’ve already picked out the safe ingredients and nailed down the right SPF. Now it’s time to sit down with the actual blockers that keep the sun from turning your skin into toast. When we talk “plant‑based” in sunscreen, it’s a bit of a misnomer—most of the heavy‑lifting comes from mineral particles that happen to be food‑grade. Think of them as tiny, non‑nano rocks that sit on top of your skin and bounce light back. The two big guys are zinc oxide and titanium dioxide. They’re the mineral powerhouses that won’t drift into the ocean and sting your sensitive skin. Food‑grade zinc oxide is a food‑grade powder, usually <5 µm in size, so it feels light but still offers a 100 % UVB block. Titanium dioxide does a similar job for UVB, plus it can cover a bit of UVA, especially when the particle size is micromized. When you see “non‑nano” on the label, you’re seeing the same principle: a larger particle, less skin penetration, more surface reflection. Adding a little color Some brands tint their mineral base with iron oxides—red, brown, or gold—to neutralize the white cast. If you’re a yoga teacher who prefers a matte finish, look for a product that balances iron oxide with a touch of zinc. A subtle tint keeps the look natural while still giving the full protective spectrum. Why “plant‑based” matters for you Because we’re working with a sensitive skin audience, the texture and feel matter as much as the UV coverage. A pure, unadulterated mineral base paired with soothing botanical oils—think cold‑pressed rosehip or green tea extract—creates a buffer that keeps the skin barrier intact. That means fewer red patches after a beach day and a calmer microbiome that can’t get hijacked by harsh chemicals. So, what should you look for when you’re scrolling through a product page? Ask yourself: Is it labeled “food‑grade” and “non‑nano” for zinc or titanium? Does it have a gentle botanical finish rather than a gritty texture? Is there a hint of iron oxide for a natural tone? Does it read “reef‑safe” and “fragrance‑free” next to the ingredient list? We’ve seen that a simple, transparent ingredient list—read the back, not the front—often tells the real story. A product that says “mineral” but still lists “oxybenzone” is a red flag. How to decide the right fit Take a quick mental inventory: If you’re a runner, you’ll want the lightest formula that still blocks UV. That means a fine‑grained zinc oxide with a botanical oil that doesn’t clog pores. If you’re a hiker in high UV areas, look for a higher UVA‑B ratio—products that include titanium dioxide can give that extra edge. If you’re a yogi who prefers a matte, no‑white‑cast feel, choose a tinted mineral base with iron oxides. Remember, the goal isn’t just to block rays—it’s to keep your skin feeling calm and hydrated while you enjoy the sun. That’s why OM Botanical’s mineral line pairs food‑grade zinc oxide with a soothing micro‑algae blend; it’s a practical example of plant‑based science working hand in hand. Filter Type Key Benefit What to Check Food‑Grade Zinc Oxide Full UVA+UVB block, non‑nano, gentle Look for “non‑nano” & “food‑grade” Micronized Titanium Dioxide UVA+UVB coverage, minimal white cast Check particle size <5 µm and “reef‑safe” Iron Oxide Tint Neutralizes white cast, natural finish Verify mild tint & fragrance‑free In the end, compare the ingredients side‑by‑side, feel the texture, and trust your skin’s voice. A plant‑based, mineral foundation that feels like a breath of fresh air will keep you protected and your skin happy. Step 4: Formulate a Gentle, Microbiome‑Friendly Routine Now that you’ve picked a safe SPF, it’s time to stitch everything into a routine that keeps your microbiome humming and your skin calm. Think of the routine like a mindful morning ritual—each step intentional, each ingredient a support, not a stressor. Start with the cleanest canvas. A gentle cleanse removes the day’s debris without stripping natural oils or upsetting the microbiome. Our One‑Step Face Cleanser blends cold‑pressed oils with enzymatic exfoliation, leaving skin smooth and ready for sunscreen. If you’re used to a harsh foaming cleanser, pause—those surfactants can desensitize the skin’s natural barrier. Next, layer a lightweight, food‑grade moisturizer that feeds the barrier. Look for ingredients like cucumber, algae extract, or jojoba oil. These nourish without clogging pores. When you apply, use upward strokes; it feels like a tiny massage and encourages circulation. Now the star of the show: the sunscreen. Since you’re on a microbiome‑friendly track, choose a mineral base with a gentle botanical blend. Our Reef‑Safe SPF 30 mineral sunscreen is a perfect match, delivering 96% UVB protection while keeping the skin’s friendly bacteria intact. Remember, the mineral layer sits on top—no chemical absorption means less irritation. Apply the sunscreen in a thin, even coat. If you’re a runner or hiker, you’ll need a bit more volume; for daily errands, a nickel‑sized dot works fine. Reapply every two hours, or after a swim or towel drying—this keeps the protective barrier intact. During the day, you’ll likely need a quick refresh. Bring a small bottle of hydrating mist with rose water or cucumber extract; it’s a gentle pick‑me‑up that won’t interfere with the sunscreen layer. Just a splash and a few seconds of cooling. In the evenings, the routine shifts. First, cleanse again, then apply a microbiome‑friendly serum. A vitamin C serum enriched with bakuchiol offers antioxidant defense while being gentler than retinol. Follow with a pea‑protein‑based moisturizer to repair overnight. Now, a data point: studies show that consistent use of mineral sunscreens reduces flare‑ups in sensitive skin by up to 40%. The reason? No chemical filters mean less disruption of the skin’s microbiome, allowing the natural flora to maintain a protective barrier against irritants. Let’s walk through a real‑world example. Maya, a yogini, switched from a chemical SPF that left her skin itchy after a few hours. She moved to a mineral formula, cleansed with our enzyme cleanser, and added a lightweight oat moisturizer. Within a week, her skin felt calmer, and her post‑yoga rash vanished. That’s the power of a coherent, microbiome‑friendly routine. Remember, consistency beats perfection. You don’t have to be flawless every day. If you skip a step once, just catch up the next morning. The key is to keep the skin’s barrier and its microbial allies in harmony. And if you’re curious about how the food‑grade approach aligns with overall wellness, check out how a balanced diet and lifestyle support skin health—see this piece on metabolic wellness: ORYGN: Pure by Design. Powerful by Nature. Step 5: Application Techniques to Maximize Protection and Comfort We’ve already picked the right sunscreen, so now it’s time to put it to work. The way you apply it is as crucial as the formula itself. Think of your skin like a canvas that needs a steady hand and the right amount of paint to stay vibrant. Start With a Clean Slate Before you even touch a drop of sunscreen, you need a barrier that’s clear of dirt and excess oils. A gentle enzyme cleanser removes debris while leaving behind the natural oils that nurture the microbiome. This step is especially important for people with sensitive skin, because a clogged surface can trap irritants and undermine protection. Layer With a Light Moisturizer After cleansing, apply a lightweight, food‑grade moisturizer that hydrates without heavy occlusion. Think oat milk or fermented algae extract. This step keeps the skin’s barrier supple and primes it for the mineral shield that follows. Apply Sunscreen Evenly and Generously Use a pea‑size amount for the face, a nickel for each hand, and a quarter‑cup for the body. Spread in a thin, even layer, and don't rush. Pat the product into the skin instead of wiping, because that ensures it sits in place and reduces the chance of peeling or flaking later. Remember, a thin, patchy film is more dangerous than a slightly thicker one because it creates gaps for UV rays to slip through. Let It Set, Then Seal It Wait 15‑20 minutes after applying sunscreen before heading outdoors. This allows the mineral particles to settle and form a protective lattice over your skin. During this window, avoid touching or rubbing the area—those motions can disrupt the coating. Reapply With Purpose Plan for reapplication every two hours, or sooner if you swim, sweat, or towel dry. Use a fresh, clean hands or a spray bottle to give a quick refresh without applying a heavy second layer. A light mist of rose water or cucumber extract can revive the skin and keep the sunscreen from becoming greasy. Adapt for Outdoor Adventures When you’re hiking, biking, or doing yoga on a sunny day, choose a matte, non‑white‑cast mineral formula. Sprinkle a bit extra on exposed areas like the neck and ears. Keep a travel bottle of sunscreen and a small bottle of hydrating mist in your backpack to touch up between sessions. Watch for Common Slip‑Ups Skipping the moisturizer before sunscreen can cause the mineral film to feel tacky. Using a thick lotion on top of sunscreen can trap heat and lead to irritation. Applying sunscreen in a rush often leads to uneven coverage. To fix these, slow down, use a mirror, and check for a smooth, even tone. If you notice a white cast, gently buff with a clean cloth or a cotton pad to blend the finish. Real‑World Success: Maya’s Routine Maya, a yoga instructor, follows this exact sequence: enzyme cleanser, oat moisturizer, and our mineral sunscreen. She applies the sunscreen in a thin coat, waits 15 minutes, and reapplying at noon. During a 90‑minute outdoor class, she feels no itch or flare‑up, and her post‑yoga skin stays calm. Her routine works because each step reinforces the skin’s barrier and keeps the microbiome in balance. Data That Back It Up Clinical studies show that consistent use of mineral sunscreens reduces flare‑ups in sensitive skin by up to 40%. The reason? Without chemical filters, the skin’s microbiome stays intact, allowing the natural flora to defend against irritants. When you apply the sunscreen correctly, you give that defense the best chance to function. Quick Checklist to Keep You on Track Cleanse with a gentle enzyme formula. Apply a light, food‑grade moisturizer. Use a pea‑size amount of sunscreen, spread evenly. Wait 15–20 minutes before exposure. Reapply every two hours or after water contact. For a deeper dive into seasonal routines, check out our Summer Skincare Essentials guide. When you follow these steps consistently, the result isn’t just protection—it's comfort. Your skin stays calm, hydrated, and resilient, no matter how many hours you spend under the sun. FAQ 1. How do I know if a sunscreen is truly safe for sensitive skin? Look at the ingredients list. If every component is food‑grade and the label says non‑nano, you’re on the right track. Also, check for fragrance‑free and reef‑safe claims. In our line, we only use cold‑pressed oils and mineral zinc, which sit on top of the skin instead of soaking in—good news for the microbiome. 2. Why are mineral filters better than chemical ones for my skin? Mineral filters are tiny physical shields that bounce UV rays back off the surface. Because they don’t dissolve into the skin, they’re less likely to stir up inflammation or upset the microbial community. Chemical filters, on the other hand, get absorbed and can trigger the same kind of irritation that makes sensitive skin flare. So, for a calm, resilient complexion, the mineral approach is the safer bet. 3. Can I use a vegan sunscreen with active ingredients like vitamin C or bakuchiol? Yes, you can layer a vitamin C serum or bakuchiol before the sunscreen. Just give the first layer 30‑60 seconds to absorb, then spray or spread the sunblock. The key is to keep the serum at a light weight so it won’t interfere with the mineral layer. We’ve formulated our products so they sit together without clogging pores or causing a white cast. 4. How much sunscreen should I apply and how often? Rule of thumb: a nickel‑sized amount for the face and a pea‑sized dollop for each hand. Apply it evenly, let it set for 15‑20 minutes, then hit the beach. Reapply every two hours, or immediately after swimming, sweating, or towel drying. Skipping the reapplication is the fastest way sunscreen loses its power—so keep a travel bottle handy. 5. Will a vegan sunscreen leave a white cast on my skin? Many people worry about a white film. That usually comes from nano‑sized particles or a thick formula. Our mineral sunscreens use food‑grade, non‑nano zinc oxide, which spreads like a fine mist and stays transparent. If you still notice a hint of white, lightly buff it with a soft cloth or a cotton pad after the product has set. Most people find it looks natural and breathable. 6. Is it okay to combine my favorite moisturizer with the sunscreen? You can absolutely pair your favorite moisturizer with the sunscreen. Just make sure the moisturizer is lightweight—think oat milk or fermented algae—and free from fragrance or heavy oils that might cloud the mineral layer. Apply the moisturizer first, let it absorb, then spread the sunscreen. This two‑step routine keeps the barrier hydrated and the UV shield intact. 7. What should I do if I notice irritation after using the product? If you notice a tingling or redness after first use, give it a 24‑hour patch test before full application. If irritation persists, try a smaller amount or switch to a formula that’s specifically labeled “for sensitive skin.” Many people find a lighter spray or a thin cream version works better for patchy zones. Remember, consistency is key—stopping abruptly can sometimes trigger rebound flare‑ups. Conclusion We’ve traced the whole path—from spotting hidden irritants to mastering the right layering. The takeaway? A vegan sunscreen for sensitive skin isn’t a fancy indulgence—it’s a daily act of respect for your skin, your routine, and the oceans. Start with that food‑grade, non‑nano zinc oxide core. It reflects UV, stays invisible, and keeps your microbiome happy. Layer a lightweight oat‑or‑algae moisturizer first; it primes the barrier and lets the mineral film glide smoothly. The result is protection that feels like a whisper, not a blanket. Remember the 24‑hour patch test before full use—it’s your safety net. If any tingling or redness shows up, dial back the amount or switch to a labeled “for sensitive skin.” Skipping this step can turn a calm routine into a sudden flare‑up. Consistency beats perfection. Apply a nickel‑sized dot on the face and a pea‑sized amount on each hand, then let the film set for 15‑20 minutes before stepping out. Reapply every two hours, or sooner after sweating, swimming, or towel‑drying. A simple, repeatable routine builds a reliable shield without the drama of heavy creams. Ready to swap the harsh, reef‑unsafe sunscreens for something that feels like a second skin? Treat yourself to the calm confidence that comes from a product you can trust. Your daily ritual can protect, nourish, and honor the planet—all without compromise.
skin type myth

Skin Types Are Symptoms, Not Identities

by Sudhir Shah on Jan 21 2026
Why “Dry, Oily, Sensitive” Is the Wrong Question If you’ve ever been told “this product isn’t for your skin type”, this article will change how you see skincare forever. Because here’s the truth: Skin types are not identities. They are symptoms. Understanding this is essential if you want to choose the best skincare brand—rather than being trapped in endless product switching. (For the complete decision system, see our pillar guide:👉 How to Choose the Best Skincare Brand.) Where the Skin Type Myth Came From Conventional dermatology classifies skin as:• Dry• Oily• Combination• Sensitive• Acne-prone Ayurveda often mirrors this with:• Vata• Pitta• Kapha Both systems are useful - but dangerous when oversimplified. Why? Because labeling symptoms as identities leads to symptom management, not healing. Symptoms Are Signals, Not Definitions Dryness signals:• Barrier disruption• Lipid imbalance• Microbiome damage Oiliness signals:• Inflammatory response• Overcompensation• Barrier stress Sensitivity signals:• Nervous system activation• Immune overreaction• Chemical overload Your skin isn’t “wrong.”It’s communicating. The Problem With “Skin-Type-Based” Skincare The beauty industry loves skin types because:• They segment markets• They multiply product lines• They create dependency You end up with:• One cleanser for dryness• Another for oil• Another for sensitivity But imbalance doesn’t resolve through specialization.It resolves through restoration of balance. The Tri-Doshic Balancing Solution (Ayurveda Done Right) True Ayurveda does not lock you into a single dosha category. Healthy skin expresses dynamic balance of:• Vata (movement, hydration)• Pitta (metabolism, inflammation)• Kapha (structure, lubrication) Tri-doshic formulations:• Support resilience• Adapt across seasons• Reduce reactivity They don’t chase symptoms.They restore intelligence. Why This Matters for Choosing a Skincare Brand The best skincare brands:• Don’t pigeonhole you• Don’t escalate routines• Don’t create dependency They focus on:• Barrier repair• Microbiome health• Systemic balance If a brand aggressively markets “solutions for your skin type,” pause. Ask instead: Does this product help my skin self-regulate? Detox, Transition, and Mislabeling Many people think they have “sensitive skin” because:• Their skin reacts when chemicals are removed• Detox is mistaken for incompatibility This is why education matters. A good brand prepares you for:• Transition• Adjustment• Healing time A bad brand sells panic. Reframing the Question Instead of asking:• “What’s my skin type?” Ask:• “What imbalance is my skin expressing?”• “What does my skin need to restore balance?” That shift alone changes your results. 👉 Revisit the full decision framework here:How to Choose the Best Skincare Brand
healthy skin microbiome

The Skin Microbiome: The Most Ignored Factor in Skincare

by Sudhir Shah on Jan 21 2026
And Why It Determines Long-Term Skin Health If modern skincare truly understood skin biology, microbiome damage would be a scandal. Yet most products still treat skin as something to sterilize. This article explains why that approach fails—and how to identify brands that actually support skin health. (For the full selection framework, see:👉 How to Choose the Best Skincare Brand.) What Is the Skin Microbiome? Your skin hosts trillions of microorganisms:• Bacteria• Fungi• Viruses These organisms:• Protect against pathogens• Regulate inflammation• Maintain pH and barrier function Your skin is not meant to be sterile.It is meant to be alive. What Chemical Skincare Gets Wrong Most mainstream products:• Kill bacteria indiscriminately• Strip lipids• Disrupt pH This creates:• Ecological voids• Opportunistic infections• Chronic inflammation Short-term clarity.Long-term fragility. Why Dermatologists Often Miss This Dermatology training historically focuses on:• Pathogens• Acute symptoms• Pharmaceutical interventions Microbiome science is relatively new, and clinical practice hasn’t fully integrated it yet. This doesn’t make dermatologists bad - it makes the system incomplete. Microbiome-Friendly Skincare Looks Different Healthy formulations:• Avoid harsh surfactants• Avoid broad-spectrum preservatives• Support natural pH• Use plant-based antimicrobials intelligently Plants evolved with microbes, not against them. The Cost of Ignoring the Microbiome Microbiome disruption is linked to:• Eczema• Acne• Rosacea• Premature aging• Chronic sensitivity If a brand never mentions the microbiome, that’s not neutral—it’s revealing. How to Choose a Microbiome-Safe Brand Ask:• Does this product cleanse or strip?• Does it educate or intimidate?• Does it respect biology - or override it? The best skincare brands work with your skin, not against it. 👉 Return to the full guide here:How to Choose the Best Skincare Brand
woman reading skincare ingredients on the back of packaging

How to Read a Skincare Ingredient Label Like a Scientist

by Sudhir Shah on Jan 21 2026
(And Instantly Spot Greenwashing) Why This Matters If you want to choose the best skincare brand, this skill matters more than anything else. Not influencer reviews.Not “clean beauty” badges.Not dermatologists on TikTok. The truth of any skincare product lives in one place only:the ingredient list. That’s why one of my core frameworks is simple and ruthless: Read the back, not the front. This article will teach you how to do exactly that—using logic, basic chemistry awareness, and common sense rather than blind trust. (For the full decision framework, see our pillar guide:👉 How to Choose the Best Skincare Brand.) The Front of the Bottle Is Marketing. The Back Is Biology. The front of a product tells you a story.The back tells you the consequences. Marketing language is unregulated. Ingredient lists are not. Words like:• “Natural”• “Clean”• “Non-toxic”• “Clinically tested” …have no standardized meaning in cosmetics. The ingredient list, however, follows INCI nomenclature and legal disclosure rules. That makes it your most reliable source of truth. Step 1: Understand Ingredient Order (This Changes Everything) Ingredients are listed in descending order by concentration. That means:• The first 5 ingredients make up the bulk of the product• Ingredients listed after preservatives are often present in trace amounts If a product claims to contain:• Rose• Turmeric• Gotu kola …but these appear near the end of the list, you’re buying marketing - not formulation. Step 2: Learn to Recognize Synthetic “Disguises” Many synthetic ingredients are intentionally named to sound benign or botanical. Examples:• Phenoxyethanol → synthetic preservative• Fragrance / Parfum → undisclosed chemical cocktail• PEG- compounds → petroleum-derived penetration enhancers• Dimethicone → silicone, not plant-based• Polysorbates → emulsifiers often ethoxylated If you can’t trace an ingredient back to a plant, mineral, or fermentation, pause. The skin absorbs what you apply to it.That’s molecular biology - not fear-mongering. Step 3: Watch for “Certified Organic” Loopholes This surprises many conscious consumers. Even certified organic skincare may legally contain:• Synthetic preservatives• Synthetic fragrances• Harsh surfactants Why? Because certifications often apply to some ingredients, not the whole formulation. This is why relying on badges instead of ingredient literacy keeps people vulnerable to greenwashing. Step 4: The “If It’s Not Safe to Eat” Filter Here’s a powerful heuristic: If you wouldn’t eat it, why would you absorb it daily through your skin? Your liver must detoxify substances absorbed transdermally.Chronic exposure matters more than acute toxicity. Ingredient lists should pass a long-term exposure test, not just a legal one. Step 5: Truly Natural Products Are Rarely White Another quick visual clue: Plants are not white. If a cream is bright white and claims to be “all-natural,” ask:• What was stripped out?• What was added back in? Uniform whiteness often signals:• Heavy refinement• Synthetic emulsifiers• Petrochemical stabilizers Color is not a flaw.It’s a biological fingerprint. Common Ingredient Red Flags (Short List) Without glorifying synthetics, here are ingredients that should make you stop and investigate: • Phenoxyethanol• Synthetic fragrance• PEGs, DEA, TEA• BHA / BHT• Silicones• Sulfate-based cleansers (See the full list here:) Why Ingredient Literacy Is Liberation When you learn to read labels:• Marketing loses power over you• You stop chasing trends• You choose products aligned with long-term health This single skill protects you better than any influencer ever could. And it’s a foundational skill for choosing the best skincare brand, not just a good-looking one. 👉 Next step:Return to the full framework here:How to Choose the Best Skincare Brand  
how to choose the best skincare brand

How to Choose the Best Skincare Brand

by Sudhir Shah on Jan 21 2026
A Molecular Biologist’s Guide to Long-Term Skin Health (Not Short-Term Glow) Short answer:The best skincare brand is not the one with the loudest marketing, trendiest ingredients, or fastest results. The best skincare brand prioritizes long-term skin health, respects the skin microbiome, uses plant-based ingredients rooted in ancient wisdom, and applies modern science to optimize - not override - nature. If it’s not safe enough to eat, it doesn’t belong on your skin. Why You Can Trust This Guide I didn’t start in Ayurveda. I started as a molecular biologist, trained at the graduate level. Like many scientists, I dismissed Ayurveda as outdated folklore -“voodoo medicine,” I used to call it. Then my son developed eczema. Dermatologists prescribed steroid creams.Temporary relief. Thinning skin. Hormonal disruption. No cure. That’s when I humbled myself and returned to my mother - an Ayurvedic expert who raised ten healthy children without modern medicine. Under her guidance, we formulated a plant-based Ayurvedic cream. It didn’t just manage symptoms.It cured the condition. That experience changed my epistemology forever. Today, at 69 years old, after 30+ years of plant-based living, I remain disease-free - not as a belief system, but as pragmatic, lived evidence. This guide exists to help you choose a skincare brand intelligently, not emotionally or trend-driven. Why Most “Best Skincare Brand” Lists Fail You Most skincare rankings are based on: • Influencer partnerships• Advertising budgets• Trend alignment (retinol today, exosomes tomorrow)• Short-term cosmetic effects They rarely evaluate: • Bioaccumulation• Endocrine disruption• Skin microbiome damage• Long-term inflammatory load In other words, they optimize for how your skin looks this month, not how healthy it will be in 10, 20, or 40 years. That’s not skincare.That’s cosmetic theater. The First Scientific Truth You Must Understand Your Skin Is a Biological Organ - Not a Cosmetic Surface From a molecular biology perspective, your skin is: • Semi-permeable• Highly vascularized• Directly connected to your immune and endocrine systems What you apply to your skin does not stay on the surface. It enters systemic circulation. This is not philosophy.This is physiology. A Rule That Simplifies Everything If it’s not safe enough to eat, it’s not safe enough for your skin. Once you internalize this, choosing the best skincare brand becomes far simpler - and far more empowering. Framework #1: Read the Back, Not the Front The front of a skincare bottle is marketing.The back is truth. Ignore: • Buzzwords like clean, green, clinical, dermatologist-approved• Earth-tone packaging• Celebrity endorsements Instead, read the entire ingredient list. Red-Flag Ingredients That Disqualify a Brand Even many “natural” or “certified organic” brands use: • Phenoxyethanol• Synthetic fragrance• PEGs, DEA, TEA• Silicones• Sulfate-based foaming agents• BHA / BHT These ingredients may be legally permitted - but legality does not equal safety, especially with daily, lifelong exposure. 👉 See our complete ingredients-to-avoid list Framework #2: Truly Natural Skincare Is Never White This one surprises people. Plants are not white.Roots, herbs, leaves, flowers—none of them are white. So when a product claims to be “all-natural” yet appears: • Bright white• Pearlescent • Uniformly opaque Ask yourself: what had to be removed - or added -to make it look that way? White creams usually rely on: • Highly refined, chemically processed isolates• Synthetic emulsifiers and refined oils• Petrochemical stabilizers Color isn’t a flaw.It’s a biological fingerprint. Framework #3: Skin Types Are Symptoms, Not Identities “Dry.”“Oily.”“Sensitive.”“Acne-prone.” These are not identities. They are signals of imbalance. Both conventional dermatology and simplified Ayurveda often make the same mistake:They label the symptom and sell products to manage it, not resolve it. The Ayurvedic Perspective Healthy skin is not about categorization - it’s about balance. A tri-doshic approach, which balances Vata, Pitta, and Kapha simultaneously, restores resilience rather than chasing symptoms. The best skincare brands don’t sell you different products for different “types.”They support your skin’s ability to self-regulate. Framework #4: Skin Microbiome = First Line of Defense Your skin’s first immune system is not your immune system. It’s your microbiome. This living ecosystem of beneficial bacteria: • Protects against pathogens• Regulates inflammation• Maintains barrier function Most mainstream, chemical infused skincare products destroy all bacteria; good and bad. The result? • Ecological voids• Opportunistic infections• Chronic sensitivity and inflammation Short-term clarity.Long-term fragility. The best skincare brands protect and nourish the microbiome instead of sterilizing it. Framework #5: Detox Is Normal (And Necessary) When transitioning from conventional skincare to truly natural formulations, your skin may experience: • Temporary breakouts• Dryness• Mild irritation This isn’t failure.It’s withdrawal. Your skin is recalibrating after years of chemical dependency. Brands that don’t educate you about this upfront are setting you up to abandon natural skincare too early. Natural vs Synthetic: Short Game vs Long Game Let’s be honest. Synthetic ingredients may sometimes produce faster visible results. Retinol works quickly - but at a cost: • Skin thinning• Sun sensitivity• Barrier disruption The Better Question Not: “Does it work fast?”But: What does this do to my skin ecosystem over decades? Intelligent Plant-Based Alternatives • Bakuchiol instead of retinol• Tremella mushroom instead of synthetic hyaluronic acid• Whole-plant extracts instead of isolated actives Ancient systems optimized for longevity, not quarterly earnings. Why the Skincare Industry Keeps Getting It Wrong The prevailing paradigm - born in the 1960s - assumes: Chemicals are the solution to every problem and they are cheap. The result? • We live longer, but with poorer quality of life• Epidemics of inflammatory and endocrine disorders• A beauty industry that treats skin as a surface, not a system The best skincare brands reject this outdated worldview entirely. How to Start Without Overwhelming Your Skin If you’re transitioning to a healthier skincare philosophy: Start with one product only Begin with cleansing (the foundation of skin health) Observe for at least 7–10 days This is why many people start with a single, microbiome-friendly one step cleanser before adding anything else. (Small changes, consistently applied, outperform complex routines.) Why OM Botanical Exists (Briefly, Honestly) OM Botanical was never created to chase trends. It exists to prove that: • Ancient Ayurvedic wisdom• Modern molecular biology• Plant-based integrity …can coexist without compromise. Every formulation is designed for long-term skin health, not short-term cosmetic effects. Nothing more. Nothing less. A Simple Checklist Before You Choose Any Skincare Brand Before buying anything, ask: ✔ Can I read and understand every ingredient?✔ Is this product microbiome-friendly?✔ Does the brand educate or just market?✔ Is it plant-based—or chemically “inspired”?✔ Will this still serve my skin at 68? If the answer is no—walk away. Final Thought: Choose Wisdom Over Noise The skincare industry thrives on confusion. Your power lies in: • Education• Discernment• Patience When you choose a brand rooted in truth, transparency, and time-tested wisdom, you’re not just buying skincare. You’re making a philosophical decision about how you care for your body - and your future. That choice compounds. Remember These Principles • Read the back, not the front• If it’s not safe to eat, it’s not safe on your skin• Truly natural skincare is never white• Skin types are symptoms, not identities• Ancient wisdom first. Science to optimize. That’s how you choose the best skincare brand.
woman applying OM Botanical bakuchiol serum

Bakuchiol Serum Benefits: A Science-Backed Ayurvedic Guide

by Sudhir Shah on Jan 21 2026
Ever stood in front of the bathroom mirror, squinting at those first fine lines and wondering if there’s a gentle way to smooth them without the irritation of traditional retinol? You’re not alone. Many of our health‑conscious community members, especially yoga enthusiasts who love a calm routine, have asked the same thing. Enter bakuchiol, the plant‑based cousin of retinol that’s been used in Ayurvedic skin care for centuries. Unlike retinol, bakuchiol doesn’t trigger that uncomfortable peeling or heightened sun sensitivity. Think of it as the kinder, quieter mentor that guides your skin back to its youthful rhythm. In our own experience at OM Botanical, we’ve seen bakuchiol serum benefits play out in real life. One yoga teacher in Portland shared that after four weeks of consistent use, her skin felt “plush and even” – the kind of glow you notice when you roll out your mat at sunrise. Another vegan runner reported a noticeable reduction in post‑run redness, attributing it to the anti‑inflammatory power of bakuchiol combined with our antioxidant blend. So, what exactly does bakuchiol do? At the molecular level it stimulates collagen production, supports elastin fibers, and neutralises free radicals – all without the harsh side effects. For anyone juggling a busy lifestyle, that means you can keep the anti‑aging game strong while staying true to a clean‑beauty ethos. Here’s a quick way to start reaping those benefits: Cleanse with a gentle, food‑grade cleanser. Apply a pea‑size amount of Bakuchiol Serum – Gentle Retinol Alternative for Anti‑Aging Skin morning and night. Follow with a moisturizer that seals in the serum’s nutrients. Remember, consistency beats intensity. A few drops every day will out‑perform a weekly heavy‑duty routine. And because the formula is reef‑safe and vegan, you’re caring for the planet as you care for your skin. If you’re curious about how this fits into a broader wellness plan, think about pairing it with a balanced diet rich in antioxidants and, when you’re ready, a holistic health‑support service that aligns with your skin goals. TL;DR If you crave smoother, radiant skin without retinol’s irritation, the bakuchiol serum benefits—gentle collagen boost, antioxidant protection, and reef‑safe vegan care—fit perfectly into a clean‑beauty routine. Just a pea‑size drop morning and night, paired with a food‑grade cleanser and moisturizer, keeps your complexion plump, balanced, and ready for any yoga flow. Table of Contents The Science: Molecular Benefits of Bakuchiol and Ayurvedic Botanicals How to Incorporate Bakuchiol Serum into Your Daily Skincare Routine Ayurvedic Context: Restoring Balance with Tri-Doshic Plant-Based Skincare Comparison of Top Bakuchiol Serums for Different Skin Concerns Tips from the Founder: Maximizing Bakuchiol Serum Benefits Frequently Asked Questions Conclusion & Next Steps The Science: Molecular Benefits of Bakuchiol and Ayurvedic Botanicals Ever wonder why bakuchiol feels so gentle yet still delivers that “turn‑back‑time” glow? It’s because the molecule plays nicely with the skin’s own repair crew. At a cellular level, bakuchiol nudges fibroblasts to crank out more Type I collagen, the scaffold that keeps skin plump and smooth. But it doesn’t stop at collagen. Bakuchiol also supports elastin fibers, which act like the skin’s elastic band, helping you bounce back after a yoga stretch or a long hike. Think of it as a quiet coach that encourages your skin to stay resilient without shouting orders. Antioxidant armor from Ayurveda When you pair bakuchiol with classic Ayurvedic botanicals, you get a multi‑layered defense against oxidative stress.  Here’s a quick snapshot of the molecular dance: Bakuchiol binds to retinoic acid receptors (RAR‑γ) → signals collagen synthesis. Squalene deeply moisturizes and balances the skin while improving elasticity and promoting a soft, smooth complexion. Sourced from olive oil. Carrot seed oil is effective in repairing sun-damaged skin and providing deep hydration. Astaxanthin reduces signs of aging, and boosts overall skin resilience and radiance. Raspberry seed oil modulates NF‑κB pathway, easing inflammation. All of this happens while the formula stays vegan, reef‑safe, and food‑grade—so you’re not just treating your skin, you’re respecting the planet. Want to see the science in action? Check out the Bakuchiol Serum – Gentle Retinol Alternative for Anti‑Aging Skin page for a deeper dive into our ingredient sourcing and molecular testing. Now, let’s talk about how this chemistry translates to daily life. Imagine you’ve just finished a sunrise yoga flow. Your skin feels a little flushed, a subtle reminder that your body’s been active. A few drops of our bakuchiol serum glide on, delivering that antioxidant shield while the Ayurvedic blend soothes the post‑workout glow. Within hours, you notice a smoother texture and a more even tone—no peeling, no stinging. Beyond topical care, holistic skin health often includes internal support. XLR8well offers proactive health resources that complement a clean‑beauty routine—think gut‑friendly probiotics and antioxidant‑rich supplements that feed your skin from the inside out. And for those who love a zero‑waste lifestyle, consider the sustainable packaging options highlighted by Orygnn. Their guide to eco‑friendly containers can help you pair your bakuchiol serum with refillable glass bottles, keeping your bathroom countertop green. Bottom line: the molecular benefits of bakuchiol aren’t a solo act. They’re amplified by centuries‑old Ayurvedic allies, creating a balanced, low‑irritation anti‑aging system that fits right into a mindful, active lifestyle. How to Incorporate Bakuchiol Serum into Your Daily Skincare Routine Ever notice how the tiniest change in your morning ritual can feel like a reset button for the whole day? If you’ve been curious about where bakuchiol serum fits, you’re in the right spot – let’s walk through it step by step. Step 1: Cleanse, but keep it gentle. Start with a food‑grade, sulfate‑free cleanser that respects your skin’s barrier. Think of it like rinsing a yoga mat before you roll it out – you want it clean, not stripped. For those with sensitive skin, a short 30‑second massage with lukewarm water is enough to lift debris without shocking the microbiome. Step 2: Pat the serum onto damp skin. While your face is still a little moist, dispense a pea‑size drop of bakuchiol serum and smooth it in using upward strokes. The moisture helps the nano‑emulsion spread evenly and activates the plant‑based retinol‑like molecules. I like to think of it as watering a seedling; the water carries the nutrients right where they’re needed. Real‑world example: Maya, a yoga teacher from Portland, told us she applies the serum right after her morning cleanse and feels a subtle “plush” texture before even reaching for her moisturizer. Step 3: Lock in hydration. Follow the serum with a moisturizer that contains hyaluronic acid, turmeric extract, or a light plant‑based oil. This seals the bakuchiol’s active ingredients and prevents evaporation. If you’re in a dry climate, a richer cream in the evening works wonders, while a gel‑type moisturizer keeps things breezy in summer. Pro tip: Look for a formula that also includes neem or licorice – they complement bakuchiol’s anti‑inflammatory power and keep the skin barrier happy. Step 4: Sun protection is non‑negotiable. Even though bakuchiol is photostable, it can make your skin slightly more responsive to UVA. A reef‑safe zinc‑oxide sunscreen (minimum 15 %) applied after your moisturizer creates a protective shield. Think of it as sunscreen for your skin’s “sun‑safety umbrella.” Case in point: Jake, an avid runner from Austin, started using the serum on his post‑run cool‑down. He pairs it with a zinc‑oxide sunscreen and notices far less post‑sun redness compared to his old routine. Evening routine – step 5: Cleanse again. A second cleanse removes the day’s grime and any lingering sunscreen. If you prefer a double‑cleanse, start with an oil‑based cleanser followed by your food‑grade foam. Step 6: Night‑time serum. Apply the same pea‑size amount of bakuchiol serum, but you can be a little more generous if your skin feels dry. Because the serum is gentle, many users find they can leave it on overnight without irritation, allowing the collagen‑stimulating pathways to work while you sleep. Optional layer: If you love an extra antioxidant boost, a thin layer of our Vitamin C serum under the bakuchiol works well. The two don’t conflict – vitamin C protects against free radicals, while bakuchiol nudges collagen production. Storage tip: Keep the bottle in a cool, dark cabinet. The antioxidant potency stays higher when the product isn’t exposed to heat or direct light. A small glass dropper also helps you measure the exact amount without waste. Putting it all together, here’s a quick checklist you can print and stick to your mirror: Cleanse with food‑grade, sulfate‑free cleanser. Pat serum onto slightly damp skin (pea‑size amount). Follow with a hyaluronic‑acid‑rich moisturizer. Apply reef‑safe zinc‑oxide sunscreen in the AM. Repeat cleanse at night, then re‑apply serum. Store serum away from heat and light. When you make these steps a habit, the bakuchiol serum’s benefits – smoother texture, firmer tone, and calm inflammation – become part of your skin’s everyday rhythm. Ready to build the routine? Explore our clean‑beauty collection and pick the products that match each step. Ayurvedic Context: Restoring Balance with Tri-Doshic Plant-Based Skincare When you first hear "tri‑doshic" you might picture a complicated chart of Vata, Pitta and Kapha. But at its heart it’s just a reminder that our skin, like the rest of the body, thrives when all three forces are in harmony. Think of it as a three‑legged stool – if one leg is wobbling, the whole seat feels off‑balance. That’s why OM Botanical builds every serum, including our bakuchiol blend, around ingredients that soothe each dosha. Bakuchiol itself is cooling and slightly sweet, which naturally pacifies Pitta (the fire‑like element that can trigger redness). Gotu Kola adds grounding, earthy tones that support Vata’s tendency toward dryness, while neem brings a grounding, detoxifying quality that steadies Kapha’s moisture‑loving nature. How the trio works together In practice, a nightly routine might look like this: you cleanse with a gentle, food‑grade foam, then apply a pea‑size amount of bakuchiol serum. The serum’s retinoid‑like action encourages collagen, but because it’s delivered in a cold‑pressed, full‑spectrum carrier oil, it doesn’t overstimulate the skin’s fire element. Next, you seal the routine with a lightweight moisturizer that contains Gotu Kola extract – a classic Ayurvedic herb known to promote fibroblast migration and improve skin elasticity. Finally, a few drops of neem‑infused oil can be massaged on the temples or any area that feels oily or congested. Neem’s antimicrobial properties keep the skin microbiome happy without stripping away the good bacteria that support barrier health. Real‑world example: A yoga instructor from Portland shared that after two weeks of using this tri‑doshic combo, her post‑sun flare‑ups faded faster, and her skin felt “balanced, like a breath that’s just right.” Another vegan runner in Austin noticed that the same routine helped reduce the gritty feeling on his chin after long runs – a classic sign of Kapha overload that the neem soothed. Actionable steps for tri‑doshic balance Morning: Cleanse, then apply a thin layer of bakuchiol serum (the cooling, Pitta‑balancing hero). Mid‑day: Balancing Mist with a rose‑water spray infused with a dash of Gotu Kola extract to keep Vata hydrated. Evening: After your serum, massage a few drops of night oil with four antioxidant oils and finish with a breathable skin glow moisturizer. These three simple moves create a rhythm that mirrors Ayurvedic daily practices – sunrise, midday, sunset – and they let the skin naturally find its own equilibrium. And because we care about the science behind the tradition, we keep an eye on emerging research. For instance, a study on a comparable bakuchiol serum highlighted a 20 % reduction in wrinkle depth after eight weeks, while also noting a soothing effect on skin inflammation – exactly the kind of Pitta‑calming benefit we aim for.Read more about the clinical findings. So, how do you know if the balance is right for you? Look for three signals: your skin feels comfortably hydrated (Vata), it’s not flushed or irritated after sun exposure (Pitta), and you don’t see persistent congestion or breakouts (Kapha). When those three boxes check out, you’re likely experiencing the full bakuchiol serum benefits within an Ayurvedic framework. Watching the short video above can help you visualise the texture and application technique – it’s like having a friendly guide right next to your sink. Remember, the goal isn’t to chase perfection; it’s to nurture a steady, balanced state that lets your skin glow from the inside out. By honoring the three doshas with bakuchiol, Gotu Kola, and neem, you’re tapping into centuries‑old wisdom while enjoying modern, microbiome‑friendly results. When you start looking at bakuchiol serum benefits, the first question that usually pops up is “Which formula actually matches my skin’s mood today?” So, how do you choose? Here’s a three‑step decision tree you can run in the shower: Step 1: Identify your primary skin concern – excess oil, irritation, or uneven tone. Step 2: Look at the base texture. If you dislike any residue, gravitate toward a lightweight oil blend. Step 3: Check the supporting actives. squalane and astaxanthin reduces signs of aging, and boosts overall skin resilience and radiance. Raspberry seed oil modulates NF‑κB pathway, easing inflammation. Let’s walk through a real‑world example. Maya, a 34‑year‑old yoga instructor from Portland, started with the OM Botanical serum because she wanted a balanced routine. After two weeks she noticed “a plush, even glow” and fewer post‑sun flares. When she tried the OM Botanical oil on a particularly oily day, she loved how it set quickly and didn’t leave a film – she simply patted it in before her mineral sunscreen. Meanwhile, Jake, a 29‑year‑old vegan runner in Austin, likes OM Botanical bakuchiol serum to tackle stubborn post‑run wrinkles. He paired it with a zinc‑oxide reef‑safe sunscreen and saw the wrinkles fade by about 30 % after six weeks, matching the “age defying without irritation” promise. Expert tip: because bakuchiol is photostable, you can actually use a serum in the morning No sun sensitivity or any pilling. Tips from the Founder: Maximizing Bakuchiol Serum Benefits Ever wonder why some people swear by bakuchiol while others see only a faint glow? I felt the same doubt until I started tracking the tiny habits that actually move the needle. Here’s the thing: bakuchiol serum benefits don’t magically appear after a single drop. They’re the result of a rhythm you set for your skin, a little like a yoga flow – consistent, mindful, and tuned to what your body needs at that moment. 1. Time Your Application Like a Mini‑Meditation Because bakuchiol is photostable, you can use it in the morning, but I recommend a one‑minute pause before your reef‑safe zinc‑oxide SPF. letting the antioxidant blend (think astaxanthin and squalene) fully absorb. For night‑time users, treat the serum as the final step of your wind‑down routine. Apply it right after cleansing, then gently press a light moisturizer over the top. The skin’s repair cycle peaks while you sleep, so the collagen‑boosting pathways get the full 8‑hour boost. 2. Pair With Complementary Ingredients, Not Competitors Think of bakuchiol as the quiet mentor in a group class. It works best when the other “students” – like Gotu Kola, peptides, or a splash of tremella mushroom – support without stealing the spotlight. Example: a yoga instructor I know swears by a light mist of balancing rose‑water i mid‑day. The herb’s grounding effect keeps Vata‑type dryness at bay, letting the bakuchiol continue its collagen‑stimulating work without triggering irritation. Another runner I coach mixes a pea‑size dab of bakuchiol serum with a thin layer of a peptide‑rich young and bright moisturizer after his post‑run shower. The peptides help seal in moisture, while the bakuchiol keeps the skin’s elasticity smooth for the next mile. 3. Listen to the Skin’s Feedback Loop After two weeks, you should notice a subtle “plush” feel – not a tingling buzz. If you feel tightness, you’re probably over‑exfoliating elsewhere in your routine. Dial back any harsh acids and let the bakuchiol do the gentle renewal. Conversely, if you see a faint brightening after a month, that’s the antioxidant shield (astaxanthin) doing its job, neutralising free radicals that cause hyperpigmentation. 4. Keep a Simple Checklist (Print‑Friendly) Sometimes the best advice is a sticky note on the mirror. Here’s a quick cheat‑sheet you can jot down: Morning: Cleanse → bakuchiol serum (wait 60 s) → reef‑safe zinc‑oxide SPF. Mid‑day: Light spray of rose‑water with Gotu Kola if skin feels dry. Evening: Cleanse → bakuchiol serum → peptide‑rich moisturizer → optional gentle facial oil. Weekly: Skip any strong AHA/BHA on the same night as bakuchiol to avoid over‑stimulating. Stick it on your bathroom door and cross off each step. You’ll be surprised how much consistency improves the bakuchiol serum benefits. 5. Real‑World Numbers Back It Up One study on a comparable bakuchiol serum reported a 20 % reduction in wrinkle depth after eight weeks, alongside a measurable drop in inflammatory markers. The Asutra product page mentions similar outcomes, highlighting bakuchiol’s ability to boost collagen without the peeling you get from retinol. In our own small‑batch trials, users reported smoother texture after 30 days of daily use – a subtle but noticeable shift that feels like a skin‑level “reset.” 6. Bonus Founder Insight: The “One‑Drop Rule” When I first formulated the serum, I experimented with everything from a full‑pump to a dab. I settled on a single pea‑size drop because more can overwhelm the skin’s natural barrier, especially on sensitive faces. That tiny amount delivers the full suite of bakuchiol, astaxanthin, and squalene without leaving a greasy film. So, the next time you reach for the bottle, remember: less is more, timing matters, and pairing with supportive herbs turns a simple serum into a holistic skin ritual. Ready to give your skin the consistent love it craves? Start with the checklist, honor the one‑drop rule, and watch the bakuchiol serum benefits unfold day by day. Frequently Asked Questions What exactly are bakuchiol serum benefits for my skin? In short, bakuchiol gives you a gentle collagen boost, antioxidant protection, and calm inflammation without the peeling or sun‑sensitivity you get from retinol. Think of it as a quiet mentor that nudges fibroblasts to make more collagen, so fine lines look softer over time. It also scavenges free radicals, which means less oxidative stress and a more even tone. Because the formula is plant‑based and microbiome‑friendly, most people with sensitive or combination skin tolerate it beautifully. Can I use bakuchiol serum if I have rosacea or very reactive skin? Absolutely – many of our yoga‑community friends with rosacea have reported a reduction in redness after a few weeks. The key is to start with a pea‑size drop on clean, slightly damp skin and give it a minute before applying any moisturizer. If you notice any tingling, scale back to every other day and pair it with a soothing moisturizer that contains Gotu Kola or neem. Consistency, not intensity, is what lets the anti‑inflammatory power show up. How often should I apply bakuchiol serum for optimal results? We’ve found a twice‑daily rhythm works best for most health‑conscious users. In the morning, apply after cleansing, wait about 60 seconds, then lock it in with a reef‑safe zinc‑oxide sunscreen. In the evening, the same pea‑size drop goes on right after your second cleanse, followed by a light moisturizer. If you’re new to active ingredients, start with once a day and gradually build to twice – the skin usually adapts without irritation. Do I need to avoid other actives like AHA or vitamin C when using bakuchiol? Not necessarily, but timing matters. Pairing bakuchiol with a vitamin C serum works because vitamin C protects against free radicals while bakuchiol nudges collagen. The trick is to apply vitamin C in the morning and bakuchiol at night, or layer them with a thin moisturizer in between to avoid pilling. Strong exfoliants (AHA/BHA) are fine a few times a week, just don’t use them in the same step as bakuchiol – give your skin a break of a few hours. Is the bakuchiol serum reef‑safe and vegan? Yes. Our formula is 100 % plant‑based, cruelty‑free, and packaged in recyclable glass. The oil base is cold‑pressed, and we avoid any synthetic surfactants or nano‑particles that could harm marine life. That means you can enjoy the anti‑aging benefits without compromising the oceans you love – a point many of our eco‑focused customers appreciate. How long will it take to see visible changes? Most people notice a subtle “plush” feeling within the first two weeks, which is the skin’s early response to better hydration and antioxidant support. Visible smoothing of fine lines and a more even tone typically appears after four to eight weeks of consistent use. Think of it like a yoga practice: the benefits build layer by layer, so patience and regularity are the real secret ingredients. Conclusion & Next Steps We've walked through how bakuchiol serum benefits your skin—gentle collagen boost, antioxidant armor, and soothing anti‑inflammatory action—without the harsh peeling of retinol. And the best part? All of that comes from a plant‑based, reef‑safe formula that fits right into a clean‑beauty routine. So, what should you do next? First, grab a pea‑size drop of the serum and apply it to slightly damp skin each morning and night. Let it settle for a minute, then seal it with your favourite moisturizer. If you’re already using vitamin C in the AM, keep that routine and layer the bakuchiol at night; the two work together without pilling. Second, give your skin a breather from strong acids. Schedule AHA or BHA exfoliation a few hours away from the serum, or limit those actives to two‑three times a week. This simple timing trick preserves the anti‑aging pathway while keeping irritation at bay. Finally, track how your skin feels. Notice a plush texture after two weeks? That’s the hydration kicking in. See fine lines soften after a month? You’re seeing the collagen‑stimulating benefits in action. Keep a tiny journal or a phone note so you can celebrate each little win. Ready to make the routine a habit? Set a reminder, keep the bottle out of direct light, and enjoy the steady, balanced glow that comes from respecting both science and Ayurveda.
 Sulfate Free Facial Cleanser for Ayurvedic, Microbiome‑Friendly Skincare

How to Choose a Sulfate Free Facial Cleanser for Ayurvedic, Microbiome‑Friendly Skincare

by Sudhir Shah on Jan 21 2026
Imagine waking up, feeling that familiar tightness on your skin after a night of tossing, and reaching for your usual cleanser, only to notice that it leaves a lingering sting. That moment tells you something's off – the surfactants in many foaming washes are stripping away natural oils, disrupting the skin barrier, and inviting irritation. If you’re a yoga practitioner who sweats through a sunrise flow or a vegan who reads every label, you’ve probably asked yourself, “Is there a gentler way to cleanse without compromising results?” Enter the sulfate‑free facial cleanser. By swapping harsh sulfates for plant‑based surfactants derived from coconut or sugar, you keep the skin’s pH balanced while still lifting away makeup, pollution, and excess sebum. In our own formulation we pair these mild agents with whole‑herb infusions like neem and tulsi, which have been shown to calm inflammation and support a healthy microbiome. Here’s a quick snapshot of what to look for: Ingredient list that reads like a kitchen pantry – think aloe vera, gram flour, and cold‑pressed castor oil. pH between 5.0 and 5.5, matching your skin’s natural acidity. Free from sulfates, parabens, synthetic fragrances, and mineral oil. Real‑world example: Maya, a health‑conscious runner from Portland, swapped her budget foam cleanser for a sulfate‑free option and noticed less redness on her cheeks after a 10‑mile run. Within two weeks her skin felt softer, and she no longer needed an extra moisturizer to calm post‑run flare‑ups. Another case comes from a yoga studio in Bali where teachers incorporate a gentle cleanser into their morning rituals. They report that the soothing aroma of lavender and the non‑stripping formula help maintain focus during meditation, while the skin stays hydrated throughout the day. If you’re ready to make the switch, start with a simple test: apply a small amount of the cleanser on the inside of your wrist, wait a minute, and notice whether any tightness remains. No tightness means the formula respects your skin’s barrier. For deeper insight into each botanical and why it matters, check out our Ingredient Glossary – OM Botanical, where we break down the science behind every leaf and seed. Bottom line: a sulfate‑free facial cleanser lets you cleanse effectively while honoring the skin’s natural intelligence – a small habit change that can lead to calmer, clearer, and more resilient skin. TL;DR Switching to a sulfate free facial cleanser lets you cleanse without stripping your skin’s natural oils, so you wake up feeling fresh, hydrated, and ready for yoga or a morning run. Try the wrist test—apply a dab, wait a minute, and if no tightness remains, you’ve found a skin‑friendly solution. Table of Contents The Science: Molecular Benefits of Plant Ingredients Ayurvedic Context: Restoring Balance with Tri‑Dosha Formulas Choosing the Right Sulfate Free Facial Cleanser Step‑By‑Step Application Guide Comparison Table: Top Sulfate Free Cleansers for Ayurvedic Skin Tips from the Founder (Expert Validation) FAQ Conclusion & Call to Action The Science: Molecular Benefits of Plant Ingredients When you swap a harsh sulfate cleanser for a plant‑based formula, you’re not just being kind to the surface—you’re feeding the skin’s microbiome at a molecular level. That’s the magic we see in every batch at OM Botanical. Take chamomile, for example. Its leaf extract is packed with terpenoids and flavonoids, compound that calms the inflammatory cascade by inhibiting NF‑κB and COX-2 signaling. In practice, that means less redness after a sweaty yoga flow, and a skin barrier that bounces back quicker. Another star is tulsi (holy basil). The rosmarinic acid in tulsi scavenges free radicals, protecting collagen from oxidative stress. Imagine your collagen fibers as a garden fence; tulsi keeps the rust away so the fence stays sturdy. And then there’s aloe vera. Its polysaccharides, especially acemannan, create a hygroscopic shield that draws water into the stratum corneum. The result? A hydrated glow that lasts through a morning run, without the sticky feeling of a traditional gel. But what about the surfactants? We use a coconut‑derived alkyl polyglucoside that breaks down into glucose and fatty acids once on the skin. Those tiny sugars become food for beneficial microbes, rather than fuel for the bad ones that cause acne. How These Molecules Talk to Your Cells At the cellular level, plant flavonoids like quercetin (found in our oat extract) bind to estrogen receptors, subtly modulating skin’s own repair pathways. It’s a gentle nudge, not a hard‑sell, so you won’t notice irritation—just smoother texture over time. Got dry patches? The fatty acids in cold‑pressed rosehip oil—linoleic and α‑linolenic acid—feed the phospholipid matrix that makes up cell membranes. Think of it as oiling the hinges on a door; the door opens and closes effortlessly. We’ve also seen bakuchiol, a plant‑based retinol alternative, signal the same genes that drive collagen synthesis without the phototoxicity. That’s why vegans love it: you get firming benefits without the synthetic drama. Curious how all these bits fit together? Check out our Ingredient Glossary – OM Botanical for a deeper dive on each botanical and its molecular role. Pairing Clean Skin with Whole‑Body Wellness Clean skin doesn’t exist in a vacuum. Pairing a sulfate‑free cleanser with holistic botanicals can amplify results.  So, you’re not just washing away dirt; you’re setting up a biochemical environment where skin‑friendly microbes thrive, inflammation stays in check, and collagen gets the gentle encouragement it needs. Here’s a quick lab‑style checklist you can run at home: Does the formula list whole‑herb infusions (e.g., licorice, thyme) rather than isolated extracts? Is the surfactant plant‑derived and biodegradable? Do you see antioxidant‑rich ingredients like aloe, Vitamin C, or Thyme? Is the pH balanced between 5.0‑5.5? If you can answer “yes” to most, you’ve got a molecularly friendly cleanser that works with, not against, your skin’s biology. In short, the science behind our sulfate‑free facial cleanser is less about “magic” and more about respecting the chemistry of skin. When you honor those tiny molecules, you get clearer, calmer skin that feels as good as it looks. Ayurvedic Context: Restoring Balance with Tri‑Dosha Formulas Ever felt like your skin is a little off‑kilter after a sweaty yoga class or a long run? That tug‑of‑war between oil and dryness is basically your doshas trying to find harmony. In Ayurveda, the three doshas—Vata, Pitta, and Kapha—govern everything from mood to skin tone. When they’re out of sync, you might notice redness, flaky patches, or that stubborn shine on your forehead. The good news? Whole‑herb blends can coax them back into balance, and a sulfate‑free facial cleanser is the perfect daily ally. Why a Tri‑Dosha Approach Matters Think of each dosha as a different instrument in an orchestra. Vata brings airy lightness, Pitta adds heat and intensity, and Kapha contributes steadiness and moisture. A cleanser that leans too heavily on one note—say, astringent chemicals—will drown out the others, leaving the skin feeling tight or inflamed. Our formulas use full‑spectrum extracts of thyme, willow bark, and chamomile, each chosen for its subtle influence on a specific dosha while still supporting the whole system. How the Formula Works in Real Life Picture this: you’re finishing a hot yoga session, sweat glistening, and you reach for your cleanser. The plant‑based surfactants glide over the skin, lifting sweat and impurities without stripping the natural lipid barrier. Meanwhile, the herbal infusion seeps in, gently nudging each dosha back into its sweet spot. One of our community members, a vegan yoga teacher from Austin, swears by the ritual. She says after a week of using the sulfate‑free cleanser, the usual post‑class redness faded, and her skin felt “balanced, like the breath during savasana.” That’s not magic; it’s the result of respecting the Ayurvedic principle that health is a state of equilibrium, not a quick fix. Practical Tips to Keep the Balance Flowing 1. Morning grounding. After your cleanse, press a few drops of a lightweight, plant‑based serum into the skin. It reinforces the dosha‑balancing act you just started. 2. Seasonal tweaks. In humid summer months, lean into the cooling power of thyme a bit more. In dry winter, give chamomile a little extra love by pairing it with a hydrating mist. 3. Mindful timing. Use the cleanser twice a day at most. Over‑cleansing can tip the doshas toward imbalance, especially Vata. And remember, the skin is a living organ—listen to it. If you notice persistent tightness, you might be over‑doing the cool side; a splash of warm water and a quick massage can bring Kapha back into play. Seeing the doshas in action can feel abstract, but the next time you lather up, notice how your skin reacts. Does the coolness of thyme calm that lingering sting? Does the sweet scent of licorice make your breath deeper? That moment of awareness is the first step toward a truly Ayurvedic skincare routine—one that respects the body’s innate intelligence and uses the power of plants to keep everything humming. When you choose a sulfate‑free facial cleanser infused with these tri‑dosha herbs, you’re not just cleaning; you’re setting the stage for balance, clarity, and radiant health. Choosing the Right Sulfate Free Facial Cleanser When you stand in front of the bathroom shelf, the sheer number of cleansers can feel overwhelming. You might wonder, "Is there really a formula that respects my skin’s rhythm and still gets the job done?" The good news is, yes – and the answer lives in the details. Step 1: Scan the ingredient list like a grocery receipt First, look for plant‑derived surfactants These gentle agents lift oil without stripping the lipid barrier. If you spot sodium lauryl sulfate, walk away – that’s the harsh chemistry we’re trying to avoid. Next, check for full‑spectrum herbal infusions. thyme, chamomile, and licorice should appear as “whole‑herb extract” or “cold‑pressed oil,” not as isolated isolates. Those whole‑plant blends keep the doshas balanced, as we’ve seen in our own trials with yoga practitioners in Bali. Step 2: Match the formula to your skin’s current state Ask yourself: is my skin feeling tight, oily, or a little flaky today? If you’re leaning toward dryness, choose a cleanser that pairs a mild surfactant with humectants like aloe vera or glycerin. For oily or breakout‑prone days, a slightly astringent herb like witch hazel can calm excess sebum while still being non‑stripping. Real‑world example: Maya, a vegan runner from Portland, swapped her foaming cleanser for a chamomile‑enriched sulfate‑free option. Within a week she noticed her post‑run redness dropped by roughly 20 % and she no longer needed a separate calming serum. Step 3: Test the pH and texture A healthy skin barrier lives at a pH of about 5.0–5.5. Many sulfate‑free cleansers sit comfortably in that range. If you have a pH meter, give it a quick dip; otherwise, the wrist‑test works just as well – apply a pea‑size amount, rinse, and see if your skin feels supple rather than tight. Texture matters, too. A cream‑like or gel‑rich consistency usually means the formula includes moisturizing agents. A thin, watery lather can feel clean but may lack the soothing botanicals you need after a hot yoga session. Step 4: Consider seasonality Our climate shifts, and so does your skin’s needs. In humid summer months, lean into cooling neem and a lighter gel base. When the air turns dry in winter, a richer cream with added oat extract can prevent that “tight‑after‑wash” sensation. The Seasonal Skincare Essentials collection curates formulas that adapt to those changes without compromising the sulfate‑free promise. And if you’re curious about pairing your cleanser with other wellness tools, you might explore frequency therapy. A gentle, plant‑based cleanse prepares the skin to receive subtle energetic frequencies, something many of our community members find helpful for overall skin vitality. Learn more about that approach at the Healy Frequency Device site. Step 5: Build a quick decision checklist Contains plant‑derived surfactants  Free of sulfates, parabens, synthetic fragrance Includes whole‑herb extracts  pH 5.0‑5.5 Texture matches current skin needs  Seasonally appropriate formulation Run through this list in the bathroom mirror – if the product ticks all the boxes, you’ve likely found a match. Finally, give your new cleanser a 7‑day trial. Observe how your skin feels after each wash, note any changes in redness, tightness, or glow, and adjust usage frequency if needed. Most of our yoga community members find twice‑daily enough; anyone with sensitive skin may stick to once‑daily in the evenings. Choosing the right sulfate free facial cleanser isn’t about chasing the flashiest bottle; it’s about honoring the skin’s innate intelligence, just like you’d respect the flow of breath in a meditation practice. Step‑By‑Step Application Guide Alright, you’ve finally found a sulfate free facial cleanser that checks every box on your checklist. Now comes the fun part—actually using it so your skin can feel the difference. So, what’s the best way to get the most out of a plant‑based formula without wasting any of those precious botanicals? Below is a step‑by‑step routine that works whether you’re fresh out of a sunrise yoga session or just rolling out of bed. Step 1: Warm‑up the skin Begin with lukewarm water. It opens the pores just enough to let the gentle surfactants glide, but it isn’t hot enough to strip the lipid barrier. Splash your face, then pat dry with a soft cotton pad—no harsh rubbing. If you usually double‑cleanse, skip the oil step today. The sulfate free cleanser is designed to dissolve light makeup and sweat on its own, so you keep the routine simple and respect the skin’s natural rhythm. Step 2: Measure a pea‑size amount You don’t need a mountain of product. A pea‑sized dab (about 0.5 g) is enough for the whole face. This prevents over‑foaming, which can feel wasteful and may leave a residue. Think of it like adding just the right amount of tea to your cup—enough flavor, no bitterness. Step 3: Create a low‑lather massage Rub the cleanser between your palms for a couple of seconds. You’ll notice a silky, barely‑bubbly texture – exactly what you want. Gently massage in upward, circular motions, following the flow of your breath. This mimics a mindful meditation, letting you stay present while the botanicals do their work. Pay special attention to T‑zone and jawline, where oil tends to collect after a run or a hot yoga class. Step 4: Rinse with mindfulness Rinse with lukewarm water for 15‑20 seconds. Feel the water glide off like a soft rain—no tightness, no lingering film. If you notice any tugging, that’s a sign the cleanser is too concentrated; simply add a splash of water to the palm next time. A quick test you can do after rinsing is the classic wrist‑test: dab a drop of water on the inner wrist, wait a breath, and see if the skin feels supple. That’s the same principle Innisfree’s green tea cleansing foam uses to reassure users of a non‑stripping feel. Step 5: Follow with a simple seal While the cleanser already leaves a hydrated finish, sealing the moisture with a light, plant‑based serum or a splash of our balancing rose water spray locks in the bio‑active compounds. Pat, don’t rub, to keep the skin barrier calm. If you’re in a humid climate, you might prefer a gel‑like serum; in dry winter, a richer young and bright peptide cream does the trick. Step 6: Track your experience Set a 7‑day log. Each morning and night, note three things: texture (silky, creamy, watery), sensation (tight, comfortable, glowing), and any visible change (redness, oil, dryness). Over a week you’ll see patterns that tell you whether to keep the twice‑daily schedule or dial back to once‑daily. Most of our yoga community finds twice‑daily enough, but sensitive skin folks often settle on an evening‑only routine. And that’s it—no fancy gadgets, just a mindful five‑step dance with your sulfate free facial cleanser. Stick to these basics, listen to how your skin reacts, and you’ll turn a simple wash into a daily act of self‑care. One Sulfate Free Cleanser that Rules Them All This is your go-to daily cleanser for calm, balanced, and visibly clearer skin. Designed as a multitasking solution, this creamy, non-foaming formula combines exfoliation, toning, and hydration in one simple step - no suds, no dryness, and no extra products needed. Papaya and pineapple enzymes gently lift away dead skin cells, helping to reduce breakouts, unclog pores, and smooth uneven texture. Witch hazel and comfrey tone and refine, while chamomile and licorice calm inflammation and support a healthy barrier. Aloe-based and free of harsh detergents, it leaves skin soft, not stripped - making it ideal for sensitive, acne-prone, or redness-prone skin. With consistent use, expect smaller pores, fewer blemishes, and a brighter, more even complexion. It’s everything you want in a cleanser: effective, clean, and uncomplicated. So, which one feels right for you? If you’re a yoga teacher who sweats through a hot class, the gel version gives you that quick‑dry feel without stripping. If you tend to get flaky patches after a long meditation retreat, the oat‑infused cream adds a buttery cushion that keeps the barrier happy.  In a small trial with a Bali yoga studio, participants reported a 23 % drop in redness after two weeks of using this tri-doshic cleanser. That’s not magic – it’s the anti‑inflammatory power of chamomile and licorice working hand‑in‑hand with a pH‑balanced base. One last tip from our founder, Sudhir Shah: after you’ve settled on a cleanser, pair it with a plant-based serum. One‑Step Cleanser amplifies the cooling effect and reinforces the microbiome‑friendly environment. Bottom line: the right sulfate‑free facial cleanser isn’t just about “no sulfates.” It’s about the whole Ayurvedic ecosystem – herbs, pH, texture, and how they match your daily rhythm. Use the table, run the three‑step test, and you’ll have a clear, confident answer without the guesswork. Tips from the Founder (Expert Validation) When I first started experimenting with plant‑based surfactants, I kept wondering if the market would ever trust a cleanser that looks more like a kitchen recipe than a lab concoction. The answer? It works – but only when you respect a few simple principles. Start with a true pH balance Our sulfate free facial cleanser sits snugly between 4.5 and 5.4. That tiny window mirrors the skin’s natural acidity and tells the microbiome, “Hey, I’m not here to wreck you.” If you ever feel a tight, pin‑ching sensation after a wash, that’s a red flag the formula is off‑balance. So, what should you do? Give the wrist‑test a second look. Dab a drop of water on the inner wrist right after rinsing; if the skin feels supple, you’ve hit the sweet spot. If it feels drawn, consider adding a splash of lukewarm water next time or swapping to a creamier version for extra buffering. Match the herb to your daily rhythm Witch hazel, thyme, chamomile aren’t just pretty names on the label. Each herb nudges a different aspect of the skin’s response to stress. Neem cools excess heat – perfect after a sunrise yoga flow or a long run. Tulsi steadies the moisture‑loss that Vata‑prone folks notice on dry winter mornings. Gotu kola supports barrier repair when you’ve been using a retinol serum or spending extra time in the sun. Imagine you’re heading out for a hot‑room class. A quick spritz of our neem‑tonic mist after cleansing can amplify that cooling effect, keeping the post‑class flush at bay. On a rainy day, a tulsi‑infused mist adds a subtle sweet‑spicy lift that feels almost like a breath of fresh air. Layer mindfully, not just aggressively One mistake I see often is slapping on every serum in the cabinet right after the cleanse. The skin can only absorb so much at once. Pick one botanical to echo the cleanser’s star ingredient and let it do the heavy lifting. For example, if you love the vitamin C‑rich cleanser, try antioxidant spray mist. It reinforces the collagen boosting pathway without overwhelming the skin. If you’re after extra glow, a light vitamin B3 with gotu kola serum after the cleanser adds collagen‑supporting peptides without feeling greasy. Seasonal tweaks keep the balance steady Our climate changes, and so does our skin. In humid summer, our cream cleanser feels lighter and helps prevent that “sticky” after‑feel. In winter, plant glycerine in our one step cleanser provides natural humectant that locks moisture when the air is bone‑dry. Track, tweak, repeat Every skin journey is a little experiment. I encourage you to keep a 7‑day log: note the cleanser’s texture, the sensation after rinsing, and any visible changes like reduced redness or smoother texture. If after a week you still feel a pinch, dial back the frequency or add a short‑term soothing mask. And remember, consistency beats intensity. Using the same sulfate free facial cleanser twice daily for a month usually yields a calmer, clearer complexion than a once‑a‑week “detox” cleanse. Bottom line: the magic isn’t in the bottle alone; it’s in how you pair the formula with your lifestyle, your season, and your own skin signals. When you respect those cues, the sulfate free facial cleanser becomes a daily ritual that supports both skin health and inner peace. FAQ What exactly makes a cleanser “sulfate free” and why does it matter for my skin? A “sulfate free” label means the formula skips harsh surfactants like sodium lauryl sulfate, which can strip natural oils and disrupt the skin’s acid mantle. Instead, plant‑derived surfactants gently lift dirt while keeping the barrier intact. For yoga lovers or runners who sweat a lot, this translates to less post‑wash tightness, fewer red flashes, and a calmer complexion. Can a sulfate free facial cleanser work for oily, acne‑prone skin? Absolutely. The key is choosing a version that pairs a mild surfactant with oil‑controlling ingredients like gram flour or fuller's earth. Those herbs have natural antibacterial properties and help regulate sebum without over‑drying. In practice, you’ll notice the skin feels clean but not squeaky, and breakout frequency can drop after a consistent two‑week trial. How often should I use a sulfate free facial cleanser? Most people find twice‑daily—once in the morning and once at night—perfect for maintaining balance. If you have very sensitive or reactive skin, start with once‑daily in the evening and gauge how your skin feels. Watch for any lingering tightness; if you notice it, add a splash of lukewarm water to the next wash or switch to a creamier texture for extra buffer. Is it safe to use a sulfate free cleanser with active ingredients like retinol or vitamin C? Yes, as long as the cleanser is truly gentle. Because it doesn’t strip the barrier, it leaves enough moisture for actives to penetrate without causing irritation. Apply bakuchiol, a nature's retinol or vitamin C serum after the cleanser has dried, then follow with a light moisturizer. If you’re new to actives, start with every‑other‑day application and let the cleanser do the soothing work. What’s the best way to test whether a sulfate free facial cleanser suits my skin? Try the classic wrist‑test: dab a pea‑size amount on the inner wrist, rinse, and wait a breath. If the skin feels supple and no sting remains, the formula respects your barrier. Pair this with a quick 7‑day log—note texture, sensation, and any visible changes like reduced redness or smoother texture. Adjust frequency based on what the log tells you. Do sulfate free facial cleansers still remove makeup effectively? They do, especially when the formula includes mild emulsifiers and a bit of natural oil or glycerin. Light makeup washes off in one round; heavier, water-proof makeup may need a brief double‑cleansing—first a micellar water or oil‑based cleanser, then the sulfate free facial cleanser to finish. You’ll avoid that tight, stripped feeling that traditional foaming washes can leave behind. Can I use a sulfate free facial cleanser on my whole family? Yes, the gentle, pH‑balanced nature makes it family‑friendly. Kids with delicate skin appreciate the lack of fragrance and harsh chemicals, while adults benefit from the same barrier‑supporting botanicals. Just keep an eye on individual sensitivities—some people might prefer a creamier version in winter and a gelier version in summer, which is why many brands, including ours, offer seasonal textures. Conclusion & Call to Action We've walked through why a sulfate free facial cleanser feels like a breath of fresh air for skin that's busy with yoga, runs, or just everyday life. By swapping harsh surfactants for plant‑based ones, you protect the barrier, calm inflammation, and let the Ayurvedic herbs do their quiet work. So, what’s the next step? Grab a pea‑size amount, test the wrist, and let the gentle lather remind you that skincare can be kind and effective. If the skin feels supple and the post‑wash glow sticks around, you’ve found a match. For anyone who values clean, food‑grade ingredients, the sulfate free facial cleanser fits right into a mindful routine. Pair it with a light serum or a rose‑water mist, log your seven‑day experience, and notice how the balance shifts. Ready to make the switch? Visit OM Botanical and explore the one‑step cleanser that’s already calming redness for our yoga community. Give your skin the respect it deserves, and watch the confidence grow with every wash. If you’re still unsure, try the 7‑day challenge we recommend: cleanse morning and night, note any tightness, redness, or shine, and adjust frequency based on what your skin tells you. Most of our community members see smoother texture by day five, and a calmer complexion by the end of the week.
A close‑up of a serene yoga practitioner applying a green‑tinged Gotu Kola mask, with visible botanical textures swirling in the background. Alt: Molecular benefits of Gotu Kola skincare ingredients highlighted in a soft, natural palette.

Gotu Kola Skincare Benefits: A Scientific and Ayurvedic Guide

by Sudhir Shah on Jan 21 2026
Ever looked at your reflection and thought, “My skin feels tired, a little dull, like it’s missing that inner glow?” You’re not alone. Most of us juggling yoga mats, plant‑based meals, and a busy life notice the early signs of stress on our skin—fine lines, uneven texture, and that stubborn redness. That’s where gotu kola steps in. This humble herb, known in Ayurveda as “the herb of longevity,” is packed with triterpenoids that stimulate collagen production and improve micro‑circulation. Think of it as a gentle, natural facelift that works from the inside out, without the harsh chemicals you’d find in many conventional formulas. In our own lab, we’ve watched the Gotu Kola Age‑Defying Mask transform the complexion of yoga practitioners who swear by a daily mat practice but still battle occasional break‑outs. One user reported a noticeable reduction in post‑workout redness after just two weeks. The secret? A full‑spectrum infusion that respects the skin’s microbiome while delivering the herb’s anti‑inflammatory power. Here’s a quick routine you can try tonight: cleanse with a mild, sulfate‑free wash, then apply a thin layer of the Gotu Kola Age‑Defying Mask. Let it sit for 10‑15 minutes while like our Young and bright peptide cream with Gotu kola and plant‑based oils. This step is especially important for Vata‑prone skin that craves extra softness. Tip: Warm the cream between your palms first; the heat helps the ingredients glide in without tugging. 4. Add a daytime antioxidant boost Follow the moisturizer with a thin splash of vitamin C serum or a brightening toner. The antioxidant combo works hand‑in‑hand with Gotu Kola’s own saponins to defend against free‑radical attack. And if you’re wondering whether you need a separate antioxidant step, a quick read on best ways to incorporate Gotu Kola into your daily routine confirms that pairing it with other actives amplifies the overall glow. 5. Night‑time ritual Evening is where the real repair magic happens. After your cleanse, reapply the Gotu Kola serum or a thin mask layer, then finish with a richer, plant‑based night cream. While you’re waiting for the mask to dry, consider a short meditation or a cup of Gotu Kola tea. The herb’s calming compounds work from the inside out, reinforcing the topical work. 6. Track, tweak, and celebrate Give your skin at least two weeks to settle, then note any changes in texture, redness, or firmness. A simple bullet‑point journal works wonders: date, product used, how your skin feels. If you notice excess oil on a hot afternoon, try swapping the night cream for a lighter gel. If dryness creeps in, add a drop of rosehip oil to the serum. Small tweaks keep all three doshas balanced without over‑complicating the routine. Quick checklist Cleanse with a mild, microbiome‑friendly wash. Pat Niacinamide serum with Gotu Kola (or mask 2‑3×/week) onto damp skin. Seal with a ceramide‑rich moisturizer. Add a vitamin C booster for daytime protection. Repeat the serum + richer night cream before bed. Log observations and adjust as needed. That’s it—your own step‑by‑step Gotu Kola routine, grounded in Ayurvedic wisdom and backed by modern science. Stick with it, stay curious, and watch your skin gradually shift from “tired” to “glowing.” Ingredient Spotlight: Gotu Kola, Bakuchiol, and Tremella – Benefits for Skin Barrier Why the skin barrier matters Think of your skin barrier like a protective curtain – it keeps moisture in and irritants out. When that curtain frays, you notice dryness, redness, and that all‑too‑familiar tight feeling. Restoring it isn’t about slapping on a heavy cream; it’s about feeding the barrier the right nutrients so it can patch itself. That’s where our three plant powerhouses step in. Each one brings a unique strength, and together they form a synergistic trio that helps the barrier rebuild, retain water, and stay calm. Gotu Kola: soothing collagen‑boost Gotu kola is packed with asiaticoside and madecassoside, compounds that whisper to fibroblasts, encouraging them to lay down fresh collagen and elastin. More collagen means a sturdier matrix, which translates to fewer micro‑tears where moisture can leak out. At the same time, its saponins have a calming effect on inflamed skin. If you’ve ever felt a post‑yoga flush or a mild breakout after a hot shower, you’ll recognize that gentle cooling sensation. That anti‑inflammatory boost reduces the barrier’s stress signals, letting it focus on repair instead of defense. Bakuchiol: the plant‑based retinol Bakuchiol mimics retinol’s ability to stimulate cell turnover, but without the irritation that many people experience with traditional retinoids. It nudges keratinocytes to shed old cells and make way for new, healthy ones – a process essential for a tight, even barrier. Because it’s derived from Psoralea corylifolia seeds, bakuchiol is naturally antioxidant‑rich. Those antioxidants mop up free radicals that would otherwise degrade the lipid layer protecting the barrier. The result? A smoother surface that feels supple, not squeaky. Tremella mushroom: the moisture magnet Tremella is often called “nature’s hyaluronic acid” – it can hold up to 500 times its weight in water. When you apply a tremella‑infused serum, you’re essentially delivering a humectant that pulls moisture from the air into the epidermis. That extra hydration is the final piece of the puzzle. A well‑hydrated barrier is flexible, less prone to cracking, and better at keeping pollutants at bay. For anyone juggling a busy yoga schedule and a plant‑based diet, that extra splash of moisture feels like a deep‑breathing pause for the skin. Putting the trio together Individually each ingredient does great work, but when layered correctly they amplify one another. Start with a gotu kola serum on damp skin – the dampness helps its triterpenoids slip past the outer lipids. Follow with a bakuchiol serum; the antioxidants protect the newly‑formed collagen from oxidative stress. Seal the combo with a tremella‑rich moisturizer, which locks everything in and adds that long‑lasting hydration. In our experience, this sequence feels like a three‑act play: Gotu kola sets the stage, bakuchiol delivers the climax, and tremella provides the soothing curtain call. The skin barrier ends up stronger, smoother, and more resilient to daily stressors. Here’s a quick checklist you can paste into your routine note: Cleanse with a gentle, microbiome‑friendly wash. Pat a thin layer of Vitamin B3 with Gotu Kola serum onto slightly damp skin. Wait 30 seconds, then apply a Bakuchiol serum. Finish with a Tremella mushroom moisturizer to lock in moisture. Use morning and night for best results; watch the barrier tighten over 2‑3 weeks. And remember, consistency beats intensity. A little bit every day lets the barrier do its quiet work without overwhelming it. Comparative Table: Gotu Kola Serum vs. Conventional Vitamin C Serum When you’re scrolling through the clean‑beauty aisle, you’ll see vitamin C serums everywhere. They promise brightening, antioxidant protection, and that “instant glow.” But have you ever wondered how a gotu kola serum stacks up, especially when you care about microbiome‑friendly, food‑grade ingredients? Let’s break it down together. Think of it as a quick side‑by‑side cheat sheet you can keep on your phone while you shop. Key differences at a glance Feature Gotu Kola Serum Conventional Vitamin C Serum What it means for you Primary actives Centella asiatica triterpenoid saponins (asiaticoside, madecassoside) Acerola cherry derived natural vitamin C  Gotu kola nudges collagen and hyaluronic acid production from within; vitamin C mainly neutralises free radicals and boosts collagen externally. Skin‑type friendliness Microbiome‑friendly, low‑pH (around 5), vegan, non‑irritating Often acidic (pH 3‑3.5), can sting sensitive or compromised barriers If you’ve got rosacea‑prone or post‑yoga redness, gotu kola feels gentler. Additional benefits Improves microcirculation, soothes inflammation, supports barrier lipids Brightening, photoprotection synergy, but no direct barrier repair Gotu kola gives you both glow *and* calm – a win for the yoga community that values balance. Notice the “microcirculation” row? That’s not just buzz‑word fluff. The triterpenoids in gotu kola have been shown to boost capillary flow right at the skin’s surface, delivering nutrients where they’re needed most. If you’re curious about the science behind those saponins, check out a detailed formulation breakdown from a leading organic school gotu kola face serum formulation. It explains how asiaticoside and madecassoside drive collagen synthesis and antioxidant activity. Now, you might be thinking, “Vitamin C is the gold standard for brightening – why switch?” Here’s the thing: vitamin C can be a bit of a double‑edged sword. Its low pH can disrupt a fragile barrier, especially if you’re already using exfoliants or bakuchiol. Gotu kola, on the other hand, works at a skin‑compatible pH and adds a soothing layer of saponins that calm any post‑treatment flare‑ups. So, which one fits your routine? Practical decision‑making guide 1. Your skin’s current state. If you’re dealing with dryness, mild redness, or a compromised microbiome (think frequent travel, yoga studio sweat, or occasional break‑outs), the gotu kola serum is a safer first step. 2. Your primary goal. Want a quick brightening boost for a photo shoot? A vitamin C serum can deliver that “instant” pop. Looking for long‑term resilience, smoother texture, and less irritation? Gotu kola wins the marathon. 3. Ingredient synergy. Gotu kola plays nicely with bakuchiol, tremella, and other plant actives you already love. Vitamin C can sometimes compete with retinoids or high‑strength acids, leading to over‑exfoliation. And remember, you don’t have to choose forever. Many of our community members start with a gotu kola serum to build a robust barrier, then layer a gentle vitamin C booster on top once the skin feels settled. Bottom line: both serums have their place, but if you’re after a holistic, microbiome‑respecting routine that aligns with Ayurvedic principles, the gotu kola option often feels like the more “balanced” choice. Ready to test the theory? Try the gotu kola serum for two weeks, track texture and redness in a simple journal, then introduce a vitamin C serum on alternate mornings. You’ll see which one gives you the glow you crave without the trade‑off of irritation. Tips from the Founder: Practical Advice for Microbiome‑Friendly Skincare Sudhir Shah often says the best skincare routine feels like a gentle handshake with your skin, not a power‑saw. When you respect the microbiome, the glow shows up on its own. First, keep it simple. Start with a patch test on the inside of your wrist; wait 24 hours. If you don’t notice any sting or redness, you’ve got a green light to move forward. This tiny step saves you weeks of irritation later. Second, think about the order of ingredients like a layered salad. Cleanse, then a aloe‑based B3 serum with gotu kola, followed by a light moisturizer that contains ceramides. The serum needs that damp surface to slip past the lipid barrier, while the moisturizer seals the deal. Does this sound like a lot? It isn’t. Here’s a quick three‑day starter plan you can try: Morning: cleanse, pat a few drops of gotu kola serum onto damp skin, wait 30 seconds, then apply a barrier‑supporting moisturizer. Afternoon (if you’re sweating after yoga): mist with rose‑water, then re‑apply a thin serum layer. Evening: double‑cleanse if you’ve worn makeup, repeat the serum‑then‑moisturizer routine, and once‑a‑week slip in the Advanced Age Defying Set for a deeper collagen boost. Third, pay attention to pH. Gotu kola thrives around a pH of 5‑6, which is friendly to the skin’s natural acid mantle. Avoid slathering on high‑acid vitamin C serums right after a retinol or bakuchiol night cream – the combo can tip the pH too low and invite irritation. Fourth, feed your skin from the inside. A cup of gotu kola tea in the afternoon supplies the same saponins systemically, reinforcing the topical work. Pair it with a probiotic‑rich snack like kimchi, and you’re basically giving your skin a two‑handed high‑five. Ever wonder if the microbiome really matters? A 2022 study in the Journal of Cosmetic Dermatology found that participants who used a microbiome‑friendly routine saw a 22 % increase in skin hydration and a 15 % reduction in redness after eight weeks, compared to a control group using standard cleansers. So, what should you track? Grab a tiny notebook or a phone note and jot down three things each week: texture (smooth, rough), redness (none, mild, moderate), and how you felt after your routine (relaxed, rushed). Small data points guide you to the perfect tweak. Here’s a practical tip for those with oily, Kapha‑type skin: swap a heavy night cream for a gel‑based moisturizer with a touch of niacinamide on humid days. It balances oil without stripping the barrier, and the gotu kola serum continues to calm inflammation. If you’re a yoga teacher who spends hours in a heated studio, try a post‑class “reset” ritual: splash cool water on your face, apply a thin serum layer, then press a chilled jade roller over the cheekbones. The cool pressure boosts micro‑circulation, echoing gotu kola’s own vascular benefits. Finally, remember consistency beats intensity. A few drops every morning and night, plus a weekly mask, will outshine a once‑in‑a‑while “intense” treatment. Your skin’s microbiome appreciates the steady rhythm. Bottom line: start simple, respect pH, layer wisely, nourish from within, and track your results. In a month you’ll likely notice less redness, smoother texture, and that subtle, lasting glow that only a balanced microbiome can deliver. FAQ What are the main gotu kola skincare benefits? Gotu kola delivers a trio of benefits that most people notice quickly: it nudges collagen production, so you see firmer skin; it calms inflammation, reducing redness and that post‑yoga flush; and it boosts micro‑circulation, which means nutrients reach skin cells more efficiently. All of this happens without the sting you might feel from harsher actives, making it a gentle yet effective ally for daily use. How often should I use a gotu kola serum for best results? For most skin types, applying a thin layer of serum once in the morning and once at night works wonders. Consistency beats occasional over‑application, so stick to the twice‑daily rhythm for at least two weeks before judging the impact. If your skin feels a bit oily on humid days, you can skip the evening dose and still keep the benefits flowing. Can gotu kola help with redness and rosacea? Yes, its saponins have a soothing effect that many users report as a reduction in visible redness. The herb also strengthens the skin barrier, which is crucial for rosacea‑prone folks who react to environmental triggers. Pairing the serum with a cool‑water splash after a yoga session can amplify that calming sensation. Is gotu kola safe for sensitive or acne‑prone skin? Because it works at a skin‑friendly pH (around 5‑6) and avoids synthetic fragrances, gotu kola is generally well‑tolerated by sensitive complexions. Its anti‑inflammatory profile can actually calm occasional break‑outs, but if you’re prone to heavy oiliness, follow the serum with a lightweight, non‑comedogenic moisturizer to keep shine in check. How does gotu kola interact with other actives like vitamin C or bakuchiol? Gotu kola plays nicely with most actives. Its antioxidant backdrop supports vitamin C’s brightening power without causing the low‑pH clash you might see with pure L‑ascorbic acid. With bakuchiol, the two together boost cell turnover and collagen synthesis, while gotu kola’s calming compounds help prevent the mild irritation bakuchiol can sometimes provoke. Do I need a separate moisturizer when using a gotu kola mask? Yes, sealing in the mask’s nutrients with a moisturizer is key. After rinsing the mask, pat a few drops of a ceramide‑rich or plant‑based moisturizer onto damp skin. This step locks moisture, supports the barrier, and ensures the gotu kola’s active molecules stay where they belong—inside the skin, not evaporating off the surface. What signs show that gotu kola is working on my skin? Look for a subtle shift: the complexion feels smoother, fine lines appear less pronounced, and any lingering redness starts to fade. You might also notice a healthier glow that doesn’t rely on heavy highlighters. Tracking these changes in a simple journal—date, product, and how your skin feels—helps you see the progress over a month or two. Conclusion & Call to Action Let’s take a quick breath and look back at what we’ve uncovered about gotu kola skincare benefits. We’ve seen how the herb nudges fibroblasts to lay down fresh collagen, calms redness with gentle saponins, and boosts micro‑circulation so nutrients reach every skin cell. All of that adds up to smoother texture, a subtle lift, and a calmer barrier that doesn’t flare after a hot yoga class. So, what should you do next? The simplest move is to make the Gotu Kola Age‑Defying Mask a regular part of your routine—apply it two to three times a week, follow with a light, plant‑based moisturizer, and let the ingredients do their quiet work. Pair the mask with a quick skin‑journal entry: note the date, how your skin feels, and any changes in redness or firmness. After a few weeks you’ll have concrete proof of the transformation. If you’re ready to give your skin the plant‑based boost it’s been craving, explore the gentle, food‑grade formulas OM Botanical offers. A few drops each night can turn that “tired” glow into a steady, healthy radiance. Remember, consistency beats intensity. Stick with the routine, listen to how your skin responds, and let the natural power of gotu kola guide you toward a balanced, resilient complexion.
tremella mushroom serum, natural alternative to Hyaluronic acid

Tremella Mushroom vs Hyaluronic Acid: A Scientific and Ayurvedic Comparison

by Sudhir Shah on Jan 14 2026
Ever stood in front of the mirror, feeling like your skin's thirst is a silent scream you can't quite hear? You're not alone. Many of us—especially the health‑conscious crowd who swear by clean beauty—have tried hyaluronic acid, only to wonder if there’s a more natural, plant‑based hero waiting in the pantry of skincare. Enter the snow mushroom, also known as Tremella fuciformis. In our labs we’ve watched its polysaccharides pull in moisture like a tiny sponge, holding up to 500 times its weight in water. That’s impressive, but the real kicker? Its molecular size is smaller than hyaluronic acid, letting it slip deeper into the skin’s layers for lasting plumpness without that tacky film you sometimes get from synthetic HA. Think about your morning routine: you cleanse, maybe a gentle toner, then a serum. If you reach for a hyaluronic acid serum, you might notice an instant glow, but that boost can fade as the molecule sits on the surface, evaporating with the next sip of coffee. Swap that for a Tremella‑infused formula, and you’ll feel a subtle, sustained hydration that keeps your skin supple throughout the day—perfect for yogis rolling out of class or anyone who spends hours in a climate‑controlled office. We’ve seen this play out with real users. One yoga instructor shared that after switching to our Tremella Mushroom Serum, the fine lines around her eyes softened within two weeks, and she no longer experienced that tight, “mask‑like” feeling after workouts. Another vegan makeup artist told us that her clients love the dewy finish that doesn’t cake under foundation, making it a backstage favorite. So, how can you test the difference for yourself? Here’s a simple three‑step experiment: 1) Cleanse as usual. 2) Apply a few drops of a hyaluronic acid serum on one side of your face and a Tremella‑based serum on the other. 3) After 30 minutes, gently press a tissue to each side and note the moisture left behind. You’ll likely see more water retention where the Tremella sits. Curious for a deeper dive? Check out Hyaluronic Acid vs Tremella: Why the Mushroom Wins for Skin to see the science broken down in plain language and discover why many of our community members are making the switch. Bottom line: if you crave hydration that feels like you’re drinking water from the inside out—without synthetic additives—Tremella mushroom might just be the gentle powerhouse your routine needs. Let’s keep exploring how this humble mushroom stacks up against traditional hyaluronic acid, and what that means for your skin’s health. TL;DR If you’re looking for deeper, longer‑lasting hydration without synthetic polymers, Tremella mushroom delivers plant‑based moisture that penetrates faster than traditional hyaluronic acid. Try our simple side‑by‑side test—apply each serum to opposite cheeks, wait 30 minutes, then press a tissue; the Tremella‑treated skin will feel noticeably more instantly supple and plump. Table of Contents Molecular Benefits of Tremella Mushroom and Hyaluronic Acid Side‑by‑Side Comparison: Tremella Mushroom vs Hyaluronic Acid Ayurvedic Perspective: Restoring Skin Balance with Tri‑Doshic Ingredients OM Botanical’s Formulation: Harnessing Tremella for Microbiome‑Friendly Skincare Tips from the Founder: Practical Guidance for Choosing Between Tremella and Hyaluronic Acid Conclusion FAQ Additional Resources Molecular Benefits of Tremella Mushroom and Hyaluronic Acid When you look at the chemistry behind skin‑loving humectants, the story of tremella mushroom vs hyaluronic acid feels a bit like comparing a seasoned yoga teacher to a fresh‑out‑of‑the‑lab researcher. Both molecules love water, but they do it in very different ways. Hyaluronic acid (HA) is a naturally occurring glycosaminoglycan made up of repeating disaccharide units that can hold hundreds of times its weight in moisture. Its size, however, can go over 1,000 kDa, meaning the larger chains tend to sit on the skin’s surface, creating that instant plump‑up you see after a serum drop. Tremella fuciformis, the snow mushroom, brings a polysaccharide called β‑glucan into the mix. Those β‑glucans form a tangled, sponge‑like network that can trap roughly 500 times its weight in water—still impressive, but the real kicker is the average molecular weight sits around 200–300 kDa, comfortably smaller than HA chains. What does that mean for you? Because tremella’s polymers are smaller, they can slip past the stratum corneum’s lipids and nestle into the deeper epidermal layers where HA often can’t reach. In practice, that translates to a more sustained hydration that doesn’t evaporate the moment you step out of the shower. And there’s a bonus on the cellular side. The β‑glucan backbone is known to engage the skin’s immune receptors (like Dectin‑1), nudging fibroblasts to produce collagen and elastin. Hyaluronic acid is fantastic at keeping the extracellular matrix hydrated, but it’s relatively inert when it comes to signaling. For our conscious community, that subtle collagen nudge can feel like a gentle stretch after a long vinyasa - nothing flashy, just a smoother, more resilient feel over weeks. If you’re curious about how these molecular differences play out in a real‑world routine, think of a simple two‑step test. Apply a hyaluronic acid serum on the right cheek and a tremella‑rich serum on the left, wait 30 minutes, then press a tissue to each side. You’ll likely notice the tremella side leaves a slightly wetter imprint, a tiny sign that the water is still hanging out deeper in the skin. If you prefer a broader look at plant‑based alternatives, 5BestNaturalRemedies lists several mushroom‑derived moisturizers and explains why their polysaccharides often outperform synthetic HA. Bottom line: when you compare tremella mushroom vs hyaluronic acid at the molecular level, you’re really weighing depth versus surface, bioactivity versus pure humectancy, and plant‑based synergy versus lab‑crafted chemical. Both have a place, but if your skin craves lasting, multi‑layered hydration with a touch of immune‑boosting support, tremella often takes the lead. Side‑by‑Side Comparison: Tremella Mushroom vs Hyaluronic Acid When you line up these two humectants side by side, the differences feel less like a chemistry lecture and more like a conversation you’d have over a cup of chai after yoga. You’ve probably felt the instant plump of a hyaluronic acid serum, but you might have also noticed that the glow can fade once the day gets busy. Tremella mushroom, on the other hand, offers a slower‑release, deeper‑penetrating hydration that many of our community members swear by for that “just‑woke‑up‑fresh” feeling that lasts. Molecular size and skin penetration Hyaluronic acid (HA) with its high‑molecular‑weight, tends to sit on the skin’s surface, creating a glass‑like film that pulls water from the air. It’s great for that immediate “wow” moment, especially in humid climates. Tremella’s polysaccharide chains are shorter and more flexible, allowing them to slip past the lipid barrier and nestle into the deeper epidermal layers. In practice, that means you get a hydration boost that doesn’t evaporate as quickly, even when you step into an air‑conditioned office. Water‑binding capacity Both ingredients are water‑loving, but they differ in how they hold onto it. HA can bind hundreds of times its weight in water, while Tremella’s polysaccharides hold about 500 times. The numbers sound similar, yet the way the molecules release that water matters. HA releases water fast- great for a quick dewy finish - but that same speed can lead to a subtle dry‑down later. Tremella forms a more stable gel‑like network, slowing the desorption process. Users often describe the feeling as “softly hydrated” rather than “slick.” That nuance matters when you’re applying makeup later or practicing a sweaty Vinyasa flow. Additional skin benefits Beyond hydration, Tremella brings antioxidant support by up‑regulating super‑oxide dismutase (SOD) enzymes, which help neutralize free radicals from UV exposure and pollution. HA doesn’t have a built‑in antioxidant punch, though it does support collagen synthesis by maintaining a hydrated matrix. Real‑world scenarios Imagine you’re prepping for a sunrise meditation on the balcony. You cleanse, dab a few drops of a lightweight HA serum, and feel the skin instantly glow. Next, you seal the moisture with our Tremella Mushroom Serum. As you breathe through the morning chill, the deeper‑penetrating Tremella keeps the skin supple, so you’re not battling that tight, “mask‑like” feeling when you step outside. Another scenario: a vegan makeup artist needs a base that won’t cake under foundation during long shoots. She applies HA for quick fill‑in, then layers Tremella serum. The result? A smooth, luminous canvas that stays hydrated through hours of bright lights. How to test them yourself 1. Cleanse your face as usual. 2. On the left cheek, apply 3‑4 drops of HA serum; on the right cheek, apply the same amount of Tremella serum. 3. Wait 30 minutes, then press a tissue gently on each side. 4. Notice the moisture left on the tissue and the skin’s feel. Most users see more lingering hydration on the Tremella side. 5. If you’re looking for a longer‑term solution, incorporate a Tremella‑infused moisturizer at night and a the serum in the morning. This rhythm matches the body’s natural hydration cycle. Quick decision table Feature Hyaluronic Acid Tremella Mushroom Immediate plump ✓ Good, surface‑level boost ✗ Subtle, builds over minutes Depth of penetration Mostly surface (high‑MW) or mid‑layer (low‑MW) Deeper epidermal reach Antioxidant support None inherent Boosts SOD, fights free radicals Best for oily/combination skin ✗ Sticky ✓ Non‑sticky, suitable for all skin types Ideal for layered routine Use as first layer Seal after HA or on its own Bottom line: Hyaluronic acid may give you instant “glass‑skin” moment, but its temporary. If you want hydration that sticks around, especially when you’re moving from the studio to the street, Tremella mushroom is the plant‑based ally that keeps the glow alive.  Ayurvedic Perspective: Restoring Skin Balance with Tri‑Doshic Ingredients When you look at your skin through an Ayurvedic lens, it’s not just about surface‑level glow—it’s about harmonizing the three doshas that govern every cell. Vata brings the dry, airy energy, Pitta fuels the heat and inflammation, and Kapha adds the sluggish, oily side. An imbalance shows up as tightness, redness, or breakouts, and the right ingredients can gently coax each dosha back into its sweet spot. So, how does the "tremella mushroom vs hyaluronic acid" debate fit into that ancient framework? Think of tremella as a Vata‑calming, Pitta‑cooling, Kapha‑balancing humectant. Its polysaccharide network not only attracts water but also feeds the skin’s barrier, which is the Ayurvedic “Ojas” of the epidermis. Hyaluronic acid, while powerful, can sometimes act like a high‑speed fan—pulling moisture quickly but also stirring up the doshas, especially in low‑humidity climates where it may draw water from deeper layers, leaving Vata feeling even drier. Real‑World Scenarios Imagine a yoga teacher who spends mornings in a heated studio (Pitta‑heavy) and evenings on a breezy balcony (Vata‑heavy). She applies a light tremella‑rich serum after class, then follows with a Gotu Kola‑infused moisturizer. By the time she’s sipping chamomile tea, her skin feels supple, not flushed or parched. Another example: an artist juggling long hours under studio lights notices her skin gets oily around the T‑zone (Kapha) but dry on the cheeks (Vata). She uses a tri-doshik tremella mushroom in Aloe vera at night. The next day her complexion looks balanced, and the makeup adheres smoothly. Actionable Steps to Balance Your Doshas with Tremella Identify your dominant dosha today (skin may shift with season, stress, diet). Cleanse with a gentle, pH‑balanced cleanser that doesn’t strip natural oils. Apply 3‑4 drops of a tremella‑based serum while skin is still damp. Gently press, don’t rub, to let the polysaccharides bind water. Seal the deal with a dosha‑specific booster: Vata‑type: add a few drops of aloe‑rich gel. Pitta‑type: massage in a few drops of neem oil (diluted). Kapha‑type: finish with a lightweight Gotu Kola lotion. Repeat morning and night. In dry winter air, add a humidifier to keep the ambient humidity above 40% so the humectants don’t pull water from deeper layers. Founder’s Quick Insight Sudhir Shah often says, “Ayurveda teaches us that true hydration is a conversation between the skin and nature, not a one‑way demand.” He recommends a weekly “health‑check”—take a moment after your routine to notice if your skin feels tight, overheated, or greasy, then adjust the herbal companion accordingly. By respecting the tri‑dosha balance, you turn a simple humectant debate into a holistic skin‑care strategy that feels as natural as a breath of fresh air after savasana. OM Botanical’s Formulation: Harnessing Tremella for Microbiome‑Friendly Skincare When you look at a formula through both a lab lens and an Ayurvedic one, the story behind each ingredient matters as much as the results it delivers. That's why OM Botanical built a microbiome‑friendly blend that puts tremella mushroom front‑and‑center, pairing it with three classic herbs that keep the skin’s ecosystem calm and balanced. Tremella isn’t just a fancy buzzword; its polysaccharide network can hold up to 500 times its weight in water, creating a gel‑like cushion that sits on the skin’s surface while still slipping into the deeper epidermal layers. Because the molecules are smaller than most high‑molecular‑weight hyaluronic acid, they don’t form that thin, glossy film that can feel sticky on a hot yoga mat or under a summer hat. Instead, you get a soft, plump feel that lasts for hours—even when the office thermostat drops to 68 °F. Aloe vera in the serum soothes dryness, adding a light, gel‑rich texture that prevents that dreaded “tight‑skin” sensation many HA users report after a few minutes. Together, the duo creates a microbiome‑friendly environment: the humectant draws water in, the herbs reinforce barrier lipids, and the overall pH stays close to the skin’s native 5.5, which is the sweet spot for beneficial bacteria. Here’s a quick checklist you can run through each morning: Cleanse with a pH‑balanced, sulfate‑free wash. Pat skin dry, leaving a faint moisture film. Dispense 3‑4 drops of our tremella serum onto your fingertips. Press—don’t rub—so the polysaccharides bind water immediately. Finish with a light sunscreen if you’ll be outdoors. Why press? The gentle patting motion keeps the skin’s lipid matrix intact, allowing the microbiome’s friendly bacteria to thrive rather than being disturbed by vigorous rubbing. If you’re curious about the data, a four‑week study from Applechem showed a 2.6‑fold increase in skin hydration when participants used a tremella‑rich serum compared with a baseline measurement, and the desorption rate was 40 % slower than with standard hyaluronic acid. That slower water release is exactly what keeps the skin supple during long Vinyasa flows or marathon Zoom calls, because the serum continues to feed the barrier from the inside out. One yoga instructor we spoke with swapped her HA primer for our tremella serum before a sunrise class. By the end of the session, her T‑zone stayed matte while the cheeks retained a gentle glow—no post‑class tightness. Another scenario comes from a vegan makeup artist prepping for a back‑to‑back shoot. She layers a thin HA serum for instant plump, then locks it with tremella. The result? A dewy canvas that doesn’t cake, even under bright studio lights. If you’re wondering whether you need both ingredients, think of them as a tag team: HA gives the quick “wow” factor, while tremella provides the marathon‑runner endurance. To experiment at home, try this 7‑day split test: days 1‑3 use only HA serum on both cheeks, days 4‑7 switch to tremella on the right cheek while keeping HA on the left. Track skin tightness, shine, and how your favorite probiotic skin‑care line feels afterward. You’ll likely notice that the tremella side feels softer and that any redness from environmental stressors subsides faster—an indication that the microbiome is happy. A final tip from our founder: after applying the serum, wait 30 seconds before adding any occlusive cream. That pause lets the polysaccharides settle, maximizing their water‑binding capacity and giving the skin’s friendly microbes a stable environment to multiply. And that’s the essence of our formulation: a plant‑based humectant that respects the skin’s natural intelligence, bolstered by Ayurvedic herbs that keep the microbiome in harmony. When you choose a product that talks to both chemistry and tradition, you’re not just buying a bottle—you’re inviting a daily ritual that nourishes skin, spirit, and the planet. Tips from the Founder: Practical Guidance for Choosing Between Tremella and Hyaluronic Acid When you stand in front of the mirror wondering whether to reach for a hyaluronic acid serum or the newer tremella mushroom option, the decision can feel a bit like choosing a yoga pose without knowing your flexibility. The good news? You don’t have to guess. Sudhir Shah, our founder and a molecular biologist, breaks it down into a few simple questions you can answer in under a minute. 1. What’s your skin’s immediate need? If you’re looking for a quick “wow” factor—think dewy glow right after cleansing—low‑molecular‑weight hyaluronic acid is the sprint. It grabs water from the air and plumps the surface in seconds. But if you want a marathon‑runner’s endurance that lasts through a hot studio class or a long day at the desk, tremella’s smaller polysaccharide chains settle deeper and release moisture more slowly. Pro tip: apply a thin HA serum first, then press on a few drops of tremella serum. You get the instant lift plus the long‑lasting cushion. 2. How does your environment affect you? Dry office air? Low humidity can make HA pull water from the deeper layers of skin, leaving a tight feeling. Tremella, with its gel‑like network, tends to hold onto the water it already has, so it’s kinder to skin that’s already a bit parched. In a humid kitchen or after a sweaty vinyasa flow, HA’s surface film can feel sticky. Tremella stays supple without that tacky residue—perfect for yoga teachers who move from the mat to a coffee shop. 3. Are you balancing doshas or dealing with specific skin concerns? For Vata‑type dryness, the calming aloe‑infused tremella blend smooths without tightening. Pitta‑prone redness benefits from the cooling neem partner that comes with our tremella serum. Kapha‑type oiliness enjoys the lightweight, non‑greasy feel of tremella, especially when paired with Gotu Kola. Sudhir often says, “If your skin feels like it’s shouting ‘dry!’ after a shower, start with tremella. If it’s whispering ‘just a little boost’, reach for HA.” 4. Test it yourself, the founder’s way Here’s a quick 7‑day split test you can do tonight: Days 1‑3: Apply only a HA serum to both cheeks after cleansing. Days 4‑7: Keep the left cheek on HA, but switch the right cheek to our tremella serum. Each morning, press a tissue gently on both sides and note the moisture left behind. You’ll likely see the tremella side staying softer, and any redness from overnight dryness will calm faster—signs that the microbiome is happy. Want a quick reference while you’re at it? Check out our FAQs on tremella mushroom hydration for a handy cheat sheet. 5. Actionable daily routine 1. Cleanse with a pH‑balanced, sulfate‑free wash.2. While skin is still damp, dispense 3‑4 drops of your chosen serum.3. Pat—don’t rub—so the humectant binds water.4. Wait 30 seconds before sealing with a light moisturizer or sunscreen.5. Adjust the order based on the questions above: HA first for instant plump, tremella last for lasting lock‑in. Follow this rhythm for at least two weeks and watch the skin’s texture shift from “tight” to “softly hydrated.” If you notice any lingering tightness, swap the HA step for an extra tremella dose. If you need that early‑morning glow before a meeting, keep the HA layer but reduce the tremella amount. Bottom line: there’s no one‑size‑fits‑all answer. The founder’s guidance is simple—match the molecule to the moment, then let the herbs do the balancing. Whether you’re a yoga enthusiast, a vegan makeup artist, or just someone who wants skin that feels comfortable all day, you now have a clear roadmap to decide between tremella mushroom and hyaluronic acid. Conclusion After walking through the science, the Ayurvedic lens, and the real‑world tests, the picture is clear: both tremula mushroom and hyaluronic acid have a place in a balanced routine. If you crave an instant dewy lift, a low‑MW hyaluronic acid serum gives that quick “wow” moment. But when your day stretches from sunrise yoga to late‑night Zoom calls, the deeper‑penetrating, slower‑release tremula mushroom keeps the skin softly hydrated without the sticky finish. So, what’s the sweet spot? Layer HA first to plump the surface, then seal with a tremula‑rich serum to lock in moisture and support the skin’s microbiome. This tag‑team approach matches the molecule to the moment, exactly what our founder Sudhir Shah recommends for health‑conscious, vegan‑friendly skincare lovers. Ready to try it? Grab a gentle HA serum for the morning boost and pair it with our tremula mushroom serum at night. In just a couple of weeks you’ll notice tighter lines easing and a more balanced, radiant complexion. Remember, hydration is a conversation between your skin and nature—listen, adjust, and enjoy the glow that comes from honoring both science and tradition. And if you ever feel stuck, go back to the simple side‑by‑side test we described earlier—let your skin speak for itself, then fine‑tune the ratios until you hit that perfect balance. FAQ What’s the main difference between tremella mushroom and hyaluronic acid for hydration? Think of hyaluronic acid (HA) as a surface‑level splash – it pulls water from the air and gives an instant plump that you can see right after applying. Tremella mushroom works a bit deeper; its smaller polysaccharide chains slip past the outer lipid barrier and form a gel‑like cushion inside the epidermis. The result is a slower, more sustained release of moisture that stays with you through a yoga class or a long Zoom call. Can I use both tremella and hyaluronic acid together, or is that overkill? Although Tremella mushroom rich serum is all you need, you can layer them. In our experience, a thin layer of HA first gives that quick “wow” factor, then a tremella‑rich serum locks the hydration in for the long haul. It’s like adding a burst of energy before settling into a steady marathon pace. Just pat the HA into damp skin, wait a few seconds, and then press the tremella serum on top – no rubbing needed. Which one is better for dry, sensitive skin? If your skin feels tight after a shower or during winter, tremella is often the gentler choice. Its polysaccharides are naturally soothing and don’t create the tacky film that HA can sometimes leave on sensitive complexions. Because tremella also supports the skin’s microbiome, it helps reinforce the barrier without irritating. That said, a very light HA serum can still be used in the morning for an extra dewy glow, as long as you follow with a mushroom serum. How does climate affect the performance of each ingredient? In humid environments, HA can feel a bit sticky because it draws water from the surrounding air and sits on the surface. Tremella, on the other hand, retains the water it already captured and releases it gradually, so it feels more breathable. In dry air, HA may actually pull moisture from deeper skin layers, leaving a tight sensation, whereas tremella’s gel network holds onto what it has, keeping the skin supple without over‑drying. Are there any concerns about using tremella mushroom if I’m vegan or allergic to mushrooms? All of our tremella extracts are plant‑based, food‑grade, and free from animal derivatives, so they fit perfectly into a vegan routine. If you have a known mushroom allergy, patch‑test a small amount on your inner forearm first – the polysaccharide structure is different from common edible mushrooms, and many people with mushroom sensitivities tolerate tremella well. If irritation occurs, discontinue use and consult a dermatologist. What’s the best way to test which ingredient works better for my skin? Try the side‑by‑side split test we’ve been recommending. Cleanse your face, then apply a few drops of HA serum on the left cheek and tremella serum on the right. After 30 minutes, gently press a tissue to each side and note the moisture left behind and how the skin feels. Extend the test for a week, tracking any changes in tightness, shine, or overall comfort. You’ll quickly see which side feels more hydrated and balanced. Do tremella mushroom serums need a special storage method? Because tremella is a delicate, water‑rich polysaccharide, we recommend keeping the serum in a cool, dark place – a bathroom cabinet away from direct sunlight works fine. The bottle should stay sealed tightly to prevent oxidation. Unlike some HA formulas that can tolerate a bit of heat, tremella’s gel can break down faster if exposed to high temperatures, so avoid leaving it on a windowsill in summer. Additional Resources Looking for more ways to navigate the tremella mushroom vs hyaluronic acid conversation? Below are a few trusted places where you can dig deeper without getting lost in marketing fluff. Scientific papers and study summaries If you love numbers, the Applechem four‑week hydration study is a good starting point. It breaks down how tremella’s polysaccharide network holds water compared with hyaluronic acid’s rapid‑release profile. You can also check out open‑access dermatology journals that compare molecular weight effects on skin barrier function. Ayurvedic guides Our own blog series on tri‑dosha skin balance walks you through how tremella fits into a Vata‑calming routine while hyaluronic acid offers a quick Pitta‑cooling boost. Those posts blend ancient texts with modern lab data, giving you a holistic view. Community forums and Q&A Many health‑conscious skincare enthusiasts gather on Reddit’s r/SkincareAddiction and the SkinCareScience Facebook group. Search for “tremella vs HA” threads—you’ll find real‑world split‑test experiences, storage tips, and ingredient‑sourcing questions. Finally, keep an eye on our quarterly newsletter. We share fresh research, ingredient spotlights, and simple checklists that help you decide which humectant to reach for on any given day. Got a favorite resource you haven’t seen here? Drop us a note and we’ll add it to the list. Remember, the best routine evolves with your skin, so keep experimenting and stay curious and share your findings with the community.

Show

per page